
Recently, the fascinating world of 3D printing has exceeded beyond conventional plastics, unveiling new possibilities with castable resins. Castable resin is now a cornerstone for hobbyists, artisans and professionals in dental applications and jewelry making. The glamour of converting a digital design into a tangible, customized and detailed object is quite captivating. Castable resin is the conduit between realms of tangible reality and imagination that breathes life into intricate designs with ease and precision.
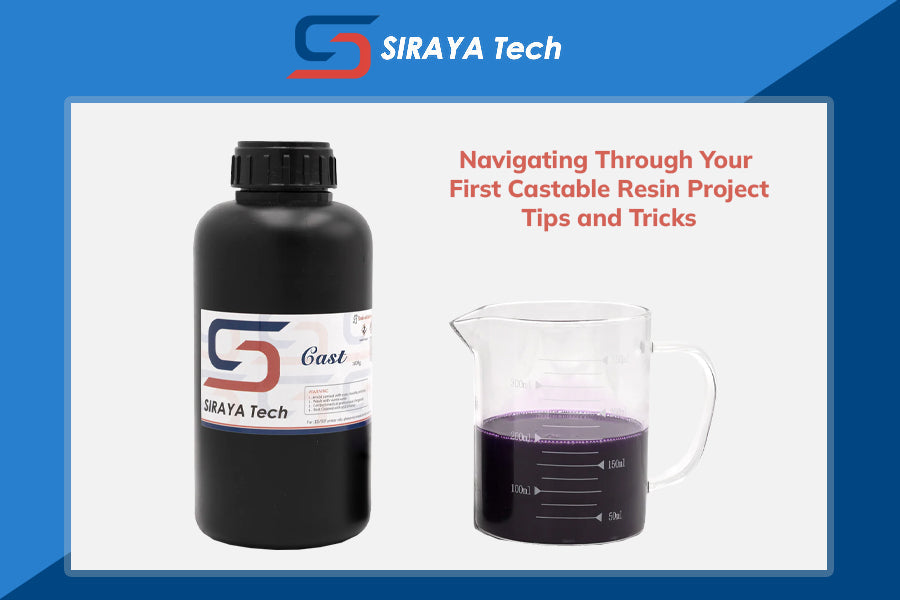
At Siraya Tech, we have passionately embraced the innovative wave of castable resin, dedicating our resources to concocting high-quality yet affordable solutions. Our efforts have birthed two remarkable castable resins: Cast Purple and Cast True Blue. These products embody our relentless pursuit of quality, affordability, and ease of use. With its impeccable resolution, Cast Purple is perfect for capturing the finest details in your designs, making best castable resin for jewelry and dental application. On the other hand, Cast True Blue, with its newly developed wax-based formulation, retains high resolution and facilitates a smoother burnout process, extending its utility to a broader spectrum of applications, including larger jewelry designs and other small metal engineering parts.
We understand that navigating the initial path of your castable resin project might seem like venturing into the unknown. However, with the right guide, the journey is exciting and rewarding. Our castable resins are designed to usher you into this exhilarating world, ensuring a seamless and enjoyable transition from digital design to a physical masterpiece. The blend of affordability and quality we offer is tailored to ensure that professionals looking to optimize their operations and beginners keen on honing their crafting skills find a reliable companion in Siraya Tech’s castable resins.
As we delve deeper into the nuances of working with the best resin for jewelry, you will find a trove of practical tips and tricks to ensure your project is successful and enjoyable. Whether you're keen on creating stunning jewelry pieces, precise dental models, or small engineered metal parts, a rewarding experience awaits you with Siraya Tech’s Cast Purple and Cast True Blue resins. Your journey into mastering the art and science of castable resin begins here, and we are thrilled to be part of your crafting narrative.
Unveiling Castable Resin
The advent of burning resin is nothing short of a revolution in the 3D printing arena, particularly when creating finely detailed jewelry and precise dental models. But what exactly is castable resin, and what makes it a preferred choice for both amateurs and seasoned professionals?
Now, when we mention the best castable resin for jewelry, we're talking about a blend of features that includes high resolution, ease of printing, and efficient burnout. Our Cast Purple and Cast True Blue resins exhibit these features, making them exemplary choices for your projects. The high resolution ensures that every intricate detail of your design is captured impeccably, while the ease of printing provides a hassle-free experience.
The process of burning resin refers to the burnout cycle, a critical phase in investment casting where the resin is eliminated from the mold, leaving behind a cavity that will be filled with metal. The ease with which a resin burns out and the cleanliness of the burnout process significantly impacts the final result. Residues can mar the perfection and intricacy of the design, a risk too high in professions demanding precision. Our resins are formulated to offer a smooth, clean burnout, thus holding a high regard among professionals.
Siraya Tech’s resins are meticulously formulated to address the common challenges of the burnout process. For instance, the wax-based formulation of Cast True Blue ensures a smoother burnout even for thicker models of elegoo castable resin, expanding its range of applications. Moreover, the affordability and superior quality make it a prime choice for beginners who are just dipping their toes into the world of castable resin and seasoned professionals seeking to optimize their processes.
The resin’s compatibility with commonly used investments and the adherence to common burnout schedules further ease the journey. We understand the diverse needs and the challenges that come with casting resin projects, and that's why we have tailored our products to offer not just a solution but a remarkable and enjoyable experience.
In essence, the journey through your first castable resin project is not just about achieving an exceptional end-product but also about the learning and the joy that comes with the crafting process. With Siraya Tech’s Cast Purple and Cast True Blue, you're not just investing in the best castable resin for jewelry, but a reliable partner committed to making your crafting journey seamless and rewarding.
Preparing for Your First Castable Resin Project
Stepping into the realm of 3D printing with castable resin is an exciting endeavor laden with the promise of creativity and innovation. The initial step in this journey is making an informed choice on the type of resin to use. Whether you are delving into jewelry making, dental model crafting, or small metal part production, selecting the best resin for jewelry or other projects based on your needs is paramount.
Here at Siraya Tech, we have crafted our Cast Purple and Cast True Blue resins to cater to a wide array of needs. Cast Purple is ideal for projects that demand high resolution to capture fine details, making it a preferred choice for jewelry and dental applications. Conversely, Cast True Blue, with its wax-based formulation, is suited for a broader range of applications, including larger jewelry designs and other small metal engineering parts. Its easier burnout property, especially for thicker models, makes it a versatile choice.
Now, onto the necessary equipment and supplies for working with castable resin for jewelry and other applications:
- 3D Printer
A suitable 3D printer is your primary tool. An MSLA printer is preferred for our resins, although DLP and LCD Printer with an FEP film-based VAT are also compatible. The choice of printer also affects the resolution and the size of the objects you can create. Using a printer with a smaller build volume for jewelry is advisable to achieve higher precision.
- Resin Vat and Build Plate
The resin vat holds the elegoo castable resin for printing, while the build plate is where your object will be built. Ensure they are clean and in good condition to achieve optimal results.
- Post-Processing Equipment
- Cleaning Supplies: You will need a good cleaning solution like 95% concentrated Ethanol or IPA to clean the printed parts.
- Curing Station: A curing station with UV light is necessary to fully cure the printed objects after cleaning.
- Glycerine: Placing the printed object in glycerine is advisable to speed up the curing without getting water on the print.
- Safety Gear
Safety should never be compromised. Ensure you have nitrile gloves, safety goggles, and a well-ventilated working area to protect yourself from exposure to burning resin and fumes.
- Miscellaneous Tools
You must have a set of miscellaneous tools like a painter's brush for cleaning, a hairdryer or air blower for drying, and scrapers for removing prints from the build plate will come in handy.
- Investment Materials
Lastly, you’ll need investment materials to create molds from your prints for the casting process. Commonly available investments work well with our resins.
Preparing adequately for your castable resin project sets a solid foundation for success. Investing time in understanding the properties of the resin, the equipment needed, and the safety precautions ensures a smoother, more enjoyable crafting experience.
At Siraya Tech, we remain committed to supporting you at every step of your crafting journey. Our comprehensive user guide provides a wealth of knowledge to help you navigate the printing, cleaning, curing, and burnout processes, ensuring that your venture into the world of castable resin is rewarding and exhilarating.
Crafting the Ideal Printing Environment
In the exhilarating journey of creating exquisite pieces through 3D printing, setting up an optimal printing environment is a cornerstone that significantly influences the outcome of your projects. Among the factors to keenly consider is the temperature at which the best resin for jewelry operates during printing. Our rigorous tests and extensive experience have illuminated the essence of maintaining the resin temperature between 25-35°C for optimal printing results.
Let’s delve into why this temperature range is crucial and how it plays a pivotal role in your project's success.
- Viscosity Management
Resin viscosity is highly temperature-dependent. In the recommended temperature range of 25-35°C, the resin maintains a lower viscosity which ensures smoother layer transitions, aiding in achieving those highly detailed and accurate prints which are often crucial in applications like jewelry making and dental modeling.
- Optimal Curing
The curing process of the resin, a transformative journey from a liquid to a solid state, is heavily influenced by the temperature. In the specified temperature range, the curing process is optimized, ensuring each layer bonds correctly with its predecessor, contributing to the structural integrity and the final aesthetics of the printed object.
- Reduced Printing Failures:
Straying far from the recommended temperature range could lead to printing failures. The elegoo castable resin might not flow or cure properly in a too-cold environment, while an extremely hot environment might cause over-curing or other undesired reactions. Maintaining the resin temperature within the stipulated range considerably minimizes the chances of such printing hitches.
- Consistent Results
Consistency is a cherished attribute in 3D printing projects for professionals and enthusiasts alike. By keeping the resin temperature within the 25-35°C range, we create a controlled environment that fosters consistency in the printing outcomes, irrespective of the project’s scale or complexity.
Creating such a conducive printing environment may necessitate a few adjustments in your workspace. For instance, employing a heater or a print chamber to regulate temperature might be requisite if you're working in a colder climate. Conversely, a cool, well-ventilated room might be ideal in warmer climates. An accurate thermometer or a temperature-controlled environment will be your ally in maintaining this crucial aspect of the printing process.
Through fostering a well-regulated printing environment, we are not just ensuring the technical success of our printing projects but also elevating the joy and satisfaction derived from seeing our creations come to life in the finest detail possible.
At Siraya Tech, we are relentless in our pursuit to facilitate a seamless, enjoyable, and fruitful 3D printing experience for all. Our Castable Resin, optimized for a temperature range of 25-35°C, is a testament to this commitment. As we continue to explore and refine the intricate dance between temperature and resin performance, we stand by you in ensuring that your 3D printing adventure is nothing short of remarkable.
Step-by-Step Guide to Your First Print
Embarking on the journey of creating your first print with castable resin is an endeavor filled with excitement and a promise of crafting tangible beauty from mere ideas. The path from design to holding a high-resolution printed object in your hands is a blend of precision, preparation, and understanding of the nuances of working with best castable resin for jewelry. Here, we are keen on demystifying the steps to achieve excellent prints, which is especially important for intricate designs like jewelry that demand high-resolution results.
- Understanding Your Resin
Our journey begins with a solid understanding of the resin we are working with. The Cast Purple and Cast True Blue by Siraya Tech are exceptional for their easy-burning characteristics and high-resolution printing capabilities. Familiarizing ourselves with the resin's mechanical properties and optimal working temperatures is a step towards mastering the art of 3D printing with castable resin.
- Designing Your Model
Your design is the cornerstone of your project. Utilizing software that caters to the demands of high-resolution printing is crucial. Ensure your model is manifold, has the correct dimensions, and is optimized for 3D printing. Attention to detail at this stage will set a solid foundation for the subsequent steps.
- Preparing the Print File
Once your design is ready, the next step is slicing the model to prepare it for printing. Using reliable slicing software, configure the settings to match the requirements of the Siraya Tech castable resin. This includes setting the layer height, orientation, and support structures to ensure a successful print.
- Setting Up Your Printer
A thorough examination and preparation of your 3D printer are essential. Ensure the build plate is level, the resin vat is clean, and the printer functions correctly. Following the user guide provided with the Cast resin, prepare your printer for the task ahead.
- Printing Your Model
Now, the moment of magic - initiating the print. Load the sliced file into your printer, ensure the resin is well mixed, and pour it into the vat. Following the recommended temperature guidelines, start the printing process. You can watch the burning resin and your design gradually come to life.
- Post-Processing
Once the print is complete, the journey of refinement begins. Carefully remove the print from the build plate, clean it with the recommended solutions, and ensure it's adequately cured to achieve the desired final properties. Your patience and meticulousness in post-processing will significantly enhance your printed object's final look and feel.
- Final Inspection
A final inspection to ensure every detail is captured and the quality meets your expectations is the last step in your printing journey. Celebrate the craftsmanship, the technology, and the learning experience embodied in the object you now hold.
- Ready for Casting
With a successful print in hand, you are now ready to venture into the casting process, transforming your dental casting resin model into a masterpiece of metal or other materials.
The process from design to a ready-for-casting print is a blend of art and science. Every step is an opportunity to learn, refine, and inch closer to perfection. With the right castable resin from Siraya Tech, a well-prepared design, and a meticulously calibrated printer, the world of impeccable high-resolution printing opens up, ready to transform your creative vision into a tangible reality.
Cleaning and Post-Processing
As we traverse the path of turning a digital design into a tangible, high-quality piece, the stages of cleaning and post-processing are critical junctures. They bridge the gap between a freshly printed object and a ready-to-cast masterpiece. The meticulousness and the care we invest in these stages significantly influence the integrity and the final outcome of our design, making them a cornerstone of crafting especially delicate and detailed items such as dental models and jewelry.
- Cleaning
Once our design has been accurately printed, cleaning is the first call to action. The cleaning process aims to remove any uncured resin from the surface of our printed object. We advise using 95% concentrated Ethanol for this task. Given its effectiveness and safety profile, it proves to be a reliable choice. Armed with a painter's brush or any brush made with hair, gently brush away the excess
castable resin for jewelry on the print, then submerge it into Ethanol and gently agitate to dislodge any remaining resin. It’s essential to act with a gentle hand to preserve the intricate details of our design, especially for fine jewelry and dental models where precision is paramount.
- Drying
Following the cleaning, prompt drying is essential. We employ a hair dryer or an air blower to evaporate the ethanol, checking the print for any shiny spots which are indicative of uncured resin. In such cases, a repeat cleaning is warranted until a matte finish is achieved across the entire surface. It's a balanced act of ensuring thorough cleaning while maintaining the integrity of our design.
- Post-Curing
Now, our journey veers towards the post-curing stage. This step is instrumental in achieving a clean burnout, especially in dental casting resin projects. A well-post-cured model will exhibit fewer residues during the burnout stage, which is essential for capturing the fine details in the casting process. Before initiating post-curing, we ensure the print is entirely dry. The print is then placed in a curing chamber. We've also discovered that immersing the print in glycerine can expedite the curing process without the risk of water ingress, which could adversely affect the burnout. The curing time may vary, but the aim is to reach a point where the print feels hard and a bit brittle, indicating it's fully cured and ready for the next stage.
- Inspection
A thorough inspection confirms that our print has retained its integrity and is in the desired state for proceeding to the casting stage. Every crevice and curve is examined to ensure no uncured resin remains, and the post-curing has effectively prepped the piece for a clean burnout.
- Preparing for Casting
With a clean, dry, and fully cured print, we now stand on the cusp of the casting process. The journey thus far has set the stage for a successful casting, whether for a piece of exquisite jewelry or a precise dental model.
Through the veil of these intricate steps, what is unveiled is a master piece, ready to take on the form of metal or any material the casting process beckons. Each stage, from cleaning to post-curing, carried out with diligence and precision, paves the way for a seamless transition to the casting phase, marking a significant stride in the realization of our envisioned masterpiece.
Navigating Common Challenges
The venture into the world of castable resin projects is as thrilling as it is demanding. Along this creative pathway, we might encounter a few common hurdles that could momentarily halt our progress. However, with a blend of knowledge and the right approach, we can seamlessly navigate these challenges, ensuring the road to craftsmanship remains unimpeded.
- Resin Adherence
One of the typical challenges we might face is resin adherence to the build platform or the VAT. This issue could lead to failed prints or even damage to the printer itself. Ensuring the build platform is well-leveled and cleaned before initiating the print is essential. A well-leveled platform fosters better adherence to the best resin for jewelry, ensuring a solid foundation for our design as it comes to life layer by layer. The cleanliness of the build platform also plays a pivotal role. A clean, residue-free surface promotes better adherence and mitigates the risk of failed prints.
- Support Structures
The necessity of effective support structures can’t be overstressed. They bear the responsibility of holding our design in place as it materializes. The absence of adequate or poorly placed supports can result in print failures or deformities in our design. We invest time in planning the support structures meticulously, ensuring they are strategically placed to provide the needed support without being overly intrusive or difficult to remove post-printing.
- Resin Temperature
The temperature of the castable resin for jewelry significantly impacts its viscosity and consequently, the print quality. The ideal resin temperature for our Cast resins is between 25-35°C. Maintaining this temperature range ensures that the resin remains at an optimal viscosity, promoting better layer bonding and overall print quality. A resin heater or a warm environment can help maintain the resin within this temperature sweet spot.
- Post-Curing Challenges
Achieving a fully cured print post-processing can sometimes be tricky, especially when working in a cooler or humid environment. Ensuring a completely dry and adequately post-cured print is essential for achieving a clean burnout, especially when working with dental casting resin. A dedicated curing chamber and perhaps the use of glycerine for curing can significantly enhance the post-curing process, ensuring our prints are well-cured and ready for casting.
- Burnout Process
The transition from a resin model to a casted piece through the burnout process holds its share of challenges. This process involves following a well-established burnout schedule, ensuring a clean burnout chamber, and using quality investment materials to navigate the burnout proficiently.
Each challenge we encounter and navigate through enriches our understanding and hones our skills further. It’s a voyage of discovery, troubleshooting, and eventual mastery. With every project, we gather more insights, making us adept at foreseeing potential hurdles and arming us with the knowledge to circumvent them efficiently. Our focus remains unswerved as we continue crafting immaculate pieces that stand as a testament to our growing expertise and the boundless potential of castable resin technology.
Conclusion
Our exploration into the realm of castable resin projects revealed a treasure trove of creativity, especially in jewelry-making and dental applications. The journey acquainted us with the distinctive qualities of Siraya Tech’s Cast Purple and Cast True Blue resins, underscoring their ease of use for both novices and seasoned creators.
We navigated through the essentials of preparing for a project, maintaining the correct resin temperature, and traversing the path from design to printing. The importance of meticulous cleaning and post-processing was highlighted, ensuring a clean burnout, which is especially crucial for dental casting resin projects.
We also faced common challenges head-on by discussing solutions to typical issues like resin adherence and smoothing the path from a resin model to a finely crafted piece.
As we conclude, creative possibilities with Siraya Tech’s Castable Resin are endless. With the insights shared, you are now better equipped to dive into the world of castable resin projects. We encourage you to explore, create, and discover the immense potential that awaits with each print. Your journey into crafting exquisite pieces is just a resin bottle away. So, dive in and let the world see your imagination take a tangible form!