
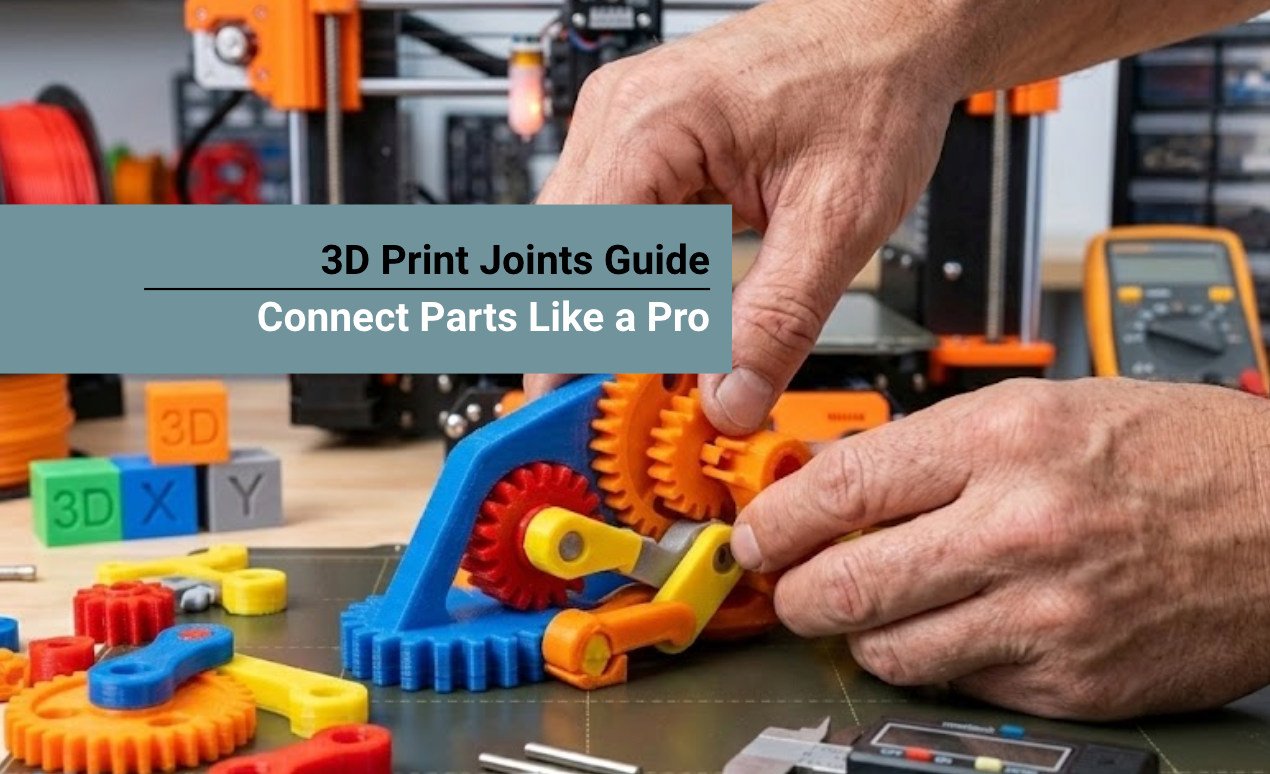
3D-printed joints are mechanical features that allow multiple 3D-printed parts to connect, move, or lock together.
These features are essential for creating objects that exceed a printer's build volume or for making functional machines with moving parts.
Success depends on selecting the appropriate joint type (such as snap-fits, hinges, or fasteners), managing the clearance between parts, and choosing materials that offer the right balance of strength and flexibility to prevent snapping during assembly.
This guide explores common connection methods, the importance of exact sizing, and how to choose the best materials to ensure your assemblies stay together under real-world pressure.
Why Are 3D Printed Joints Essential in Modern Manufacturing?
Connecting mechanisms are not just optional design flourishes; they are foundational to scalable, high-quality additive manufacturing. As creators take on more ambitious projects, splitting CAD designs into multiple distinct pieces becomes unavoidable.
- Bypassing Build Volume Limits: Standard desktop printers are restricted to a 200mm to 300mm build volume. Digital joinery allows you to break life-sized cosplay armor or massive prototypes into manageable sections, printing them independently for later assembly.
- Enhancing Modularity: A well-designed modular joint allows components to be swapped, upgraded, or rearranged without requiring a complete reprint of the entire model. This is highly beneficial for product customization.
- Improving Maintenance and Repair: Printing a massive object as one solid piece makes it incredibly fragile. With modular connections, you can simply unclip a broken bracket and print a fast, inexpensive replacement part.
- Mitigating Print Failures: Long, 40-hour prints carry a high risk of failure due to power outages or layer shifting. Breaking a project into jointed segments isolates your risk; if a failure occurs, you only lose a few hours of work.
The 5 Best Types of 3D Print Joints

Understanding the mechanics behind different connection types allows you to apply the correct structural solution to your specific engineering problem.
1. Snap-Fit Joints
Snap-fit joints are the industry standard for creating enclosures and consumer electronics cases that require hardware-free assembly. The most common variant is the cantilever snap-fit: a flexible hook that deflects slightly as it is pushed into a socket, snapping back into place to lock the parts together.
- Best Application: Battery compartments, modular cases, and quick-release mechanisms.
- Design Tip: The hook must be designed to bend along the strongest axis (the X or Y plane). Never bend it against the vertical Z-axis, or the layer lines will instantly snap.
2. Dovetail and Sliding Joints
Originating from traditional woodworking, the dovetail joint uses a flaring, trapezoidal pin that slides seamlessly into a corresponding tail. Because of its unique angled geometry, a dovetail strongly resists being pulled apart in any direction other than the sliding axis.
- Best Application: Load-bearing assemblies, sliding drawers, tool mounts, and multi-part shelving.
- Design Tip: Incorporate a slight taper (1 to 2 degrees) along the length of the dovetail. This allows the joint to slide together easily at first, progressively tightening into a friction-locked fit.
3. Pin-and-Hole (Peg) Connectors
The pin-and-hole system is the simplest and most widely used method to align and connect 3D printed parts. It involves adding protruding cylindrical pegs on one component and corresponding recessed holes on the mating part.
- Best Application: Static display models, tabletop miniatures, and parts intended to be permanently glued.
- Design Tip: Always chamfer (bevel) the edges of your pins. A slight angle acts as a guide, smoothly funneling the peg into the hole and compensating for minor first-layer "elephant's foot" expansion.
4. Ball-and-Socket Joints
These connections mimic the human shoulder, allowing for dynamic, multi-directional rotational movement. They consist of a rigid sphere snapped into a slightly flexible, cupped cavity.
- Best Application: Action figures, posable armatures, adjustable lamp stands, and camera mounts.
- Design Tip: Because these mechanisms rely entirely on friction to hold their position, choosing a highly wear-resistant material is critical so the joint does not loosen over time.
5. Print-in-Place Articulated Hinges
Print-in-place mechanisms are fully functional, moving joints printed simultaneously in a single operation, requiring zero assembly post-print. The CAD file contains tiny engineered gaps (clearances) between the moving parts so they do not fuse during extrusion.
- Best Application: Articulated toys, collapsible phone stands, and flexible chains.
- Design Tip: Print-in-place parts require immaculate printer calibration and cooling to prevent the internal walls from fusing together.
| Joint Mechanism | Primary Function / Movement | Assembly Style | Structural Strength |
|---|---|---|---|
| Snap-Fit | Locking enclosures and cases | Tool-less, Removable | Medium (Subject to bending fatigue) |
| Dovetail | Linear sliding and load bearing | Friction Fit | Extremely High |
| Pin-and-Hole | Precise static alignment | Glued / Permanent | High (Especially with metal pins) |
| Ball-and-Socket | Omni-directional rotation | Friction Snap | Medium (Weakens with high wear) |
| Print-in-Place | Single-axis hinging | No Assembly Required | Low to Medium (Limited by gaps) |
Mastering Tolerances and Clearances
The secret to flawless mechanical connections lies entirely in your tolerances (your printer's acceptable margin of error) and clearances (the intentional gap designed into the CAD model).
If the clearance is too tight, the parts will crack during forced assembly; if it is too loose, the assembly will fall apart.
- FDM Printer Clearances: For standard filament printers, a general rule of thumb is to design a 0.2mm to 0.3mm gap for a snug friction fit. If you want parts to slide freely with no resistance, increase the gap to 0.4mm or 0.5mm.
- Resin Printer Clearances: SLA and DLP resin printers offer drastically higher dimensional accuracy. When mimicking injection-molded products like building blocks, high-precision UV resins enable you to design ultra-tight clearances of 0.05mm to 0.1mm, resulting in parts that snap together perfectly.
The Best Materials for Connecting Parts

Your joint design is only as strong as the material it is printed from. Choosing the wrong polymer guarantees failure, especially in snap-fits that require temporary elastic deformation.
Filament (FDM) Choices
- PLA: Highly brittle. While acceptable for static pin-and-hole joints, PLA will easily snap if used for cantilever snap-fits or load-bearing parts. It also deforms under heat, causing friction joints to fail in warm environments.
- PETG: The optimal choice for FDM joinery. PETG possesses natural elasticity, allowing snap-fit arms to bend and return to their original shape without fracturing. It also features exceptional layer adhesion.
- ABS / ASA: Incredible for structural durability, but these materials shrink as they cool. You must compensate for shrinkage in your slicer software, or your precise joints will end up undersized.
UV Resin Choices: Overcoming Brittleness
Historically, standard 3D printing resins were notorious for being extremely brittle; forcing a peg into a hole often resulted in catastrophic shattering. For functional engineering parts, upgrading to specialized high-toughness resins is mandatory.
If you are designing mechanical aids, gears, or heavy-duty joints, Siraya Tech Blu Tough Resin is engineered specifically for this exact purpose.
- Impact Resistance: Blu balances incredible hardness with impact-absorbing flexibility, ensuring that snap-fits can bend and lock without cracking.
- Friction Endurance: Its highly wear-resistant formulation means that rotating joints and ball-and-sockets will not generate plastic powder from friction, retaining their structural integrity over thousands of cycles.
| Material Type | Brittleness | Friction Resistance | Best Used For |
|---|---|---|---|
| Standard PLA | Very High | Low | Static pins, glued assemblies |
| PETG | Low (Flexible) | Medium | Snap-fits, living hinges |
| Standard Resin | High | Low | Decorative static models |
| Blu Tough Resin | Very Low | Extremely High | Wear-resistant gears, snap-fits, moving parts |
Advanced Post-Processing and Assembly
Even with perfectly calculated tolerances, physical assembly often requires slight adjustments and post-processing for a seamless look.
Essential Assembly Tools
To achieve professional results, you need a dedicated assembly toolkit. Digital calipers are mandatory to verify the final printed dimensions of your pins against your CAD files.
Use metal deburring tools or hobby files to shave off microscopic plastic burrs or leftover support material that may obstruct the joint.
Permanent Bonding Methods
If your joint is designed for alignment rather than modularity, you will need adhesives.
- Cyanoacrylate (Super Glue): Best for rigid PLA and standard resins. It dries instantly but is brittle under severe shock.
- Two-Part Epoxy: The ultimate structural adhesive. It fills small internal gaps within the joint, distributing mechanical stress evenly.
- Solvent Welding: For ABS and ASA, applying a dab of acetone melts the polymer chains together, welding the pieces into a single, unbreakable block.
Smoothing Tight Joints
If a joint prints slightly too tight, light wet-sanding on the pin or applying gentle heat with a heat gun can soften the plastic enough to force the parts together for a custom molded fit.
Optimizing Joint Orientation for Maximum Strength
In both FDM and SLA resin printing, parts are built layer by layer. This creates a structural phenomenon known as anisotropy, meaning the part is highly strong along the X and Y axes but significantly weaker along the vertical Z-axis.
- The Problem: If you design a vertical pin and print it standing straight up on the build plate, the force of pulling or bending that pin will easily snap it along the layer lines.
- The Solution: To drastically increase the strength of your connections, you must rotate the model in your slicing software so the joints are printed horizontally (lying flat on the bed).
This ensures that the continuous strands of plastic run along the length of the joint, providing maximum tensile strength and preventing layer delamination.
Conclusion
Mastering the mechanics of 3D print joints unlocks a new tier of engineering capabilities, allowing you to bypass hardware limitations to build massive, modular, and highly functional assemblies.
By carefully selecting the appropriate mechanism, be it a snap-fit, dovetail, or pin-and-hole, and calculating precise dimensional clearances, you eliminate the guesswork from your post-processing workflow.
Crucially, pairing your intelligent CAD designs with high-performance, flexible materials like Siraya Tech Blu Tough Resin ensures your dynamic parts handle immense stress, resist friction, and perform exactly as intended for years to come.
Recommended Collections for Functional Assembly
To ensure your highly engineered joints do not fail, explore our collections of high-performance materials optimized for mechanical stress:
- Siraya Tech Tough Resin Collection
- Siraya Tech ABS-Like Resin Collection
- Siraya Tech Engineering Resin Collection
FAQs About 3D Print Joints
What is the best tolerance for 3D printed joints?
For standard FDM printers utilizing PLA or PETG, a tolerance gap of 0.2mm to 0.3mm generally provides a secure, snug friction fit. If the parts need to slide freely, increase the clearance to 0.4mm. For high-resolution SLA resin printers, you can safely utilize much tighter tolerances, ranging from 0.05mm to 0.1mm, for a precise injection-molded feel.
How do I make 3D printed snap-fit joints stronger?
To strengthen snap-fits, print the cantilever arm horizontally on the print bed so the force is applied across the continuous plastic strands rather than against the weaker Z-axis layer lines. Additionally, adding a fillet (a rounded curve) to the internal base of the snap-fit arm significantly reduces stress concentration, preventing the hook from snapping off.
What is the best glue for joining 3D printed parts?
For maximum structural strength, two-part epoxy is the best choice because it acts as a gap-filler and provides incredible impact resistance. For quick, clean assemblies on PLA or cured resin, Cyanoacrylate (Super Glue) is highly effective. If you are printing with ABS or ASA, applying acetone creates a permanent chemical solvent weld that is stronger than any traditional adhesive.
Why do my 3D printed joints keep breaking?
Joints typically break due to poor layer orientation or the use of an overly brittle material like standard PLA. If your parts are snapping along the layer lines, rotate the model 90 degrees in your slicer software. If the material itself is shattering under pressure, switch to a more flexible and durable polymer, such as PETG filament or specialized tough UV resins.
Can you print movable joints in place?
Yes, this is known as "print-in-place" assembly. By designing intentional microscopic gaps (usually around 0.3mm) between a mechanical hinge or ball joint within the CAD software, the 3D printer can extrude both pieces simultaneously without fusing them together. Once removed from the build plate, the parts can instantly rotate and move without any manual assembly.