
Have you ever wanted to turn your standard 3D prints into solid, durable metal objects? Lost PLA casting is an innovative, modern twist on the ancient lost-wax metalworking technique.
It empowers hobbyists and professionals to successfully transform plastic designs into aluminum, bronze, or silver.
While traditional 3D metal printers can cost hundreds of thousands of dollars, this highly accessible method bridges the gap between affordable desktop 3D printing and professional metallurgy.
In this comprehensive guide, we will walk you through the entire casting process, strict safety requirements, and how upgrading to high-resolution castable resins can elevate your metalwork to commercial-grade perfection.
What is Lost PLA Casting?
To understand this modern manufacturing method, we must look at its predecessor: lost-wax casting.
For centuries, artisans hand-sculpted intricate designs out of wax, encased them in plaster, and melted the wax out to form a mold for molten metal.
This analog process allowed for unparalleled detail in jewelry, dental crowns, and fine art.
Lost PLA casting follows the exact same mechanical principles, but it completely eliminates the need for manual sculpting.
- The Digital Workflow: Instead of painstakingly carving a wax model by hand, you utilize a desktop Fused Deposition Modeling (FDM) 3D printer to fabricate your design.
- The Material Advantage: Polylactic Acid (PLA) is a thermoplastic derived from organic materials like corn starch. It has the unique ability to combust almost completely when subjected to intense kiln temperatures.
- The FDM Drawback: Because standard FDM printing creates visible layer lines, the final metal cast will feature these microscopic ridges unless the 3D print is vigorously sanded prior to casting.
Essential Equipment and Consumables
Building a functional backyard or studio foundry requires a significant initial investment in specialized, high-heat equipment.
Attempting to cut corners on hardware can result in failed casts or severe safety hazards.
The Hardware Setup
- FDM 3D Printer: A reliable desktop printer is required to produce your initial positive plastic models.
- Vacuum Chamber: Plaster investment must be completely free of trapped air. A vacuum chamber forcibly pulls air bubbles out of the wet plaster mixture to prevent unwanted metal nodules on your final cast.
- Programmable Electric Kiln: This is required to bake the investment mold and burn out the PLA plastic safely. The kiln must slowly ramp up temperatures over several hours.
- Melting Furnace: A propane, electric, or charcoal-powered foundry used strictly for melting your solid metal to a liquid state.
- Steel Flasks and Crucibles: The steel flask holds the plaster mold. The crucible (typically made of graphite or clay) is the highly heat-resistant bowl where the metal melts.
- Heavy-Duty Tongs: Specially designed, long-handled tongs are required to lift glowing-hot flasks and safely pour liquid metal from the crucible.
Consumables Required for Every Cast
| Consumable Type | Specific Purpose | Material Options |
|---|---|---|
| Combustible Material | Forms the positive model and the tunnel system. | Standard PLA, Polycast filament, or specialized Sprue Wax . |
| Investment Powder | The heat-resistant plaster forms the negative mold. | Standard jewelry investment, Plasticast, or Ultravest (for high expansion) . |
| Casting Metal | The final material of your solid object. | Aluminum ingots, copper wire, brass, sterling silver grain, or bronze . |
| Fuel Source | Powers the melting furnace. | Liquid propane, high-voltage electricity, or oxy-acetylene gas . |
Non-Negotiable Health and Safety Protocols

Working with molten metals is inherently dangerous. Aluminum melts at roughly 660°C (1,220°F), while copper and bronze require even higher temperatures.
A single mistake can result in severe burns or catastrophic fires.
- The Water Danger: Molten metal instantly vaporizes any water it touches. This rapid expansion causes an explosion, shooting liquid metal in all directions. Never cast over a damp floor or wet concrete.
- Proper Workspace Environment: Always work outdoors or in a highly ventilated, fireproof workshop. Your workspace should have a dirt, sand, or firebrick floor.
- Mandatory Protective Gear: Wear a high-impact face shield, thick welder’s gloves, a leather welder's apron, and leather work boots. Never wear synthetic clothing like polyester, as extreme heat will melt it directly to your skin.
- Respirator Use: When mixing dry investment powder, always wear an N95 respirator. Investment contains cristobalite, a fine silica dust that causes permanent lung damage if inhaled.
Step-by-Step Guide to the Lost PLA Casting Process

Transforming a plastic model into a polished metal part requires patience, precise timing, and strict adherence to the following six steps.
Step 1: Preparing and 3D Printing the Model
Begin by designing your model in CAD software or downloading a file from a 3D repository.
- Slicer Settings: Ensure you print with a high infill percentage (or 100% solid) to make the model perfectly watertight.
- Avoid Hollow Gaps: If the print is hollow, the liquid investment plaster will seep inside the model and permanently ruin the mold.
- Surface Smoothing: Spend time mechanically sanding the PLA. Any layer lines, stringing, or z-seam blobs left on the plastic will be perfectly replicated in the final solid metal.
Step 2: Gating and Spruing
Your printed model must be suspended inside the plaster, and the molten metal needs a designated pathway to flow inside. This tunnel system is created using sprue wax.
- Use a thick wax rod as a central "runner" and attach your PLA model to it using smaller wax sprues.
- If your model has complex overhangs (like the outstretched arms of a statue), attach additional vents to those areas so trapped air can escape.
- Securely attach the bottom of the central wax runner to a rubber sprue base.
Step 3: Creating the Investment Mold
Place your steel flask over your sprued model, locking it tightly into the rubber base. The model must remain at least a half-inch away from the inner walls of the flask.
Mix your investment powder with water according to the manufacturer's precise ratios. Place the wet mixture into your vacuum chamber for a few minutes to aggressively boil out trapped air.
Next, pour the smooth plaster into the flask, entirely submerging the PLA model. Vacuum the flask one final time, then let the plaster cure and harden undisturbed for at least 12 to 24 hours.
Step 4: The Kiln Burnout Phase
Remove the rubber base to reveal the flat bottom of the plaster mold, which now exposes the tip of the wax runner. Place the flask upside down in your electric kiln.
You cannot simply blast the mold with high heat. The kiln must follow a specific burnout schedule—slowly ramping up to 150°C to melt the wax, then pushing to 400°C–700°C to completely incinerate the PLA plastic.
This slow ramp prevents the moisture inside the plaster from turning into steam too quickly, which would crack the mold.
zBy the end of this 5 to 12-hour cycle, the plastic vanishes, leaving a perfectly clean negative cavity.
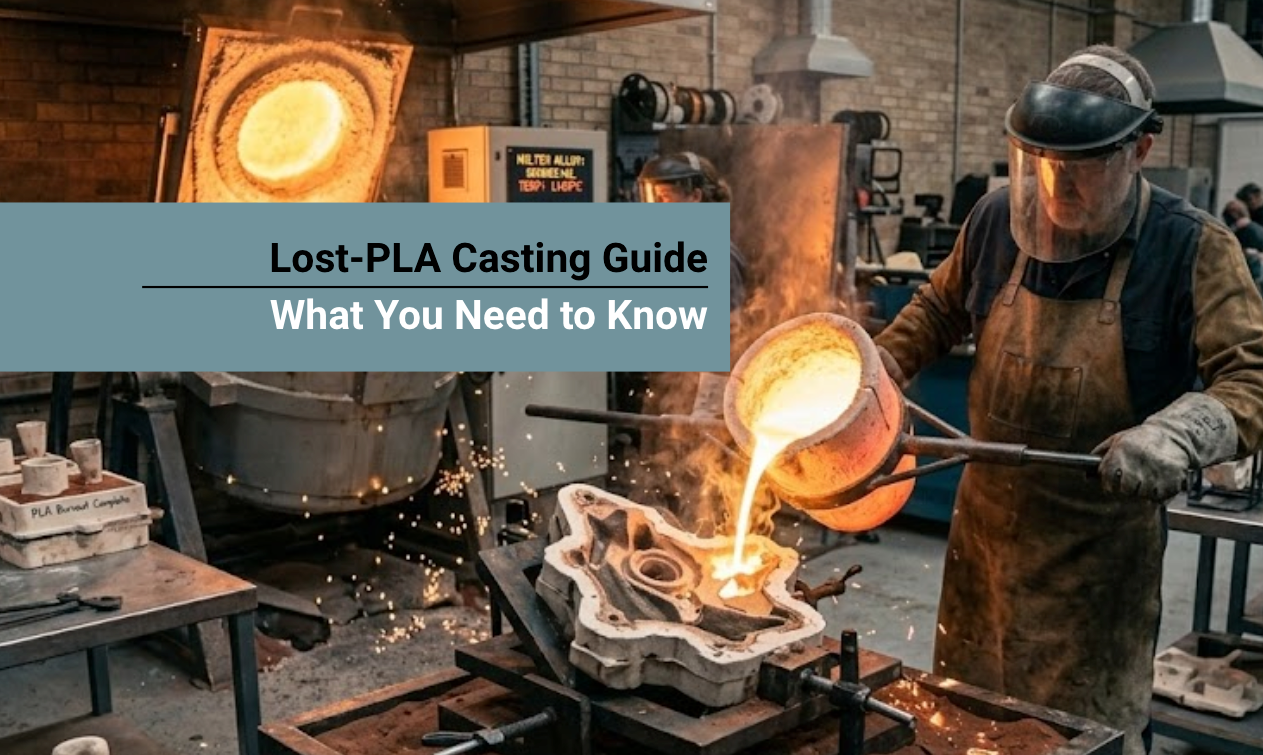
Step 5: Melting and Pouring the Metal
While the flask is finishing its final hour in the kiln, begin preparing your furnace. Place your metal ingots or casting grain into the crucible and ignite the heat source.
- Melting: Heat the metal until it reaches a completely liquid state. It should swirl like water with a convex meniscus.
- Skimming: Using a steel rod, carefully skim off the "dross" or "slag"—the floating layer of oxidized impurities resting on top of the liquid.
- The Pour: Wearing full protective gear, use your flask tongs to remove the glowing-hot mold from the kiln and place it face-up on a fireproof surface. Immediately use your crucible tongs to smoothly pour the liquid metal down into the mold's opening.
Step 6: Extraction and Post-Processing
Allow the filled mold to sit and air-cool for roughly 20 to 30 minutes, depending on the size of the cast.
While the metal is still warm but fully solidified, use tongs to submerge the entire flask into a large bucket of water.
The sudden temperature shock causes the plaster investment to violently dissolve and break away, revealing your solid metal object inside.
Finally, use a jeweler's saw or bolt cutters to snip off the metal sprues. You will need to file down the connection points, polish the object with a rotary tool, or place it in a tumbler filled with steel shot to achieve a brilliant shine.
Lost PLA vs. Castable Resin
While standard FDM printing and PLA filament are incredible for prototyping large, bulky mechanical parts, they fall significantly short when producing fine jewelry, miniatures, or high-precision components.
PLA notoriously leaves behind small amounts of carbon ash during the burnout phase, which pits and tarnishes the surface of silver or gold casts.
Furthermore, sanding FDM layer lines off a tiny, intricate ring is virtually impossible.
For creators looking to produce retail-ready metal parts, the modern industry standard has shifted away from PLA toward LCD/DLP 3D printing utilizing specialized castable resins.
Why Siraya Tech Castable Resin is the Ultimate Solution
If you want to bypass the frustrations of tedious manual sanding and ash-ruined casts, upgrading your toolkit to utilize Siraya Tech Cast - Castable Resin is a game-changing commercial pivot.
Engineered specifically for precision investment casting, this material replaces traditional PLA entirely.
- Wax-Based Formulation: Unlike standard photopolymer resins that expand and crack molds during heating, Siraya Tech Cast contains real wax. This allows it to melt and burn out cleanly, efficiently, and with zero residual ash.
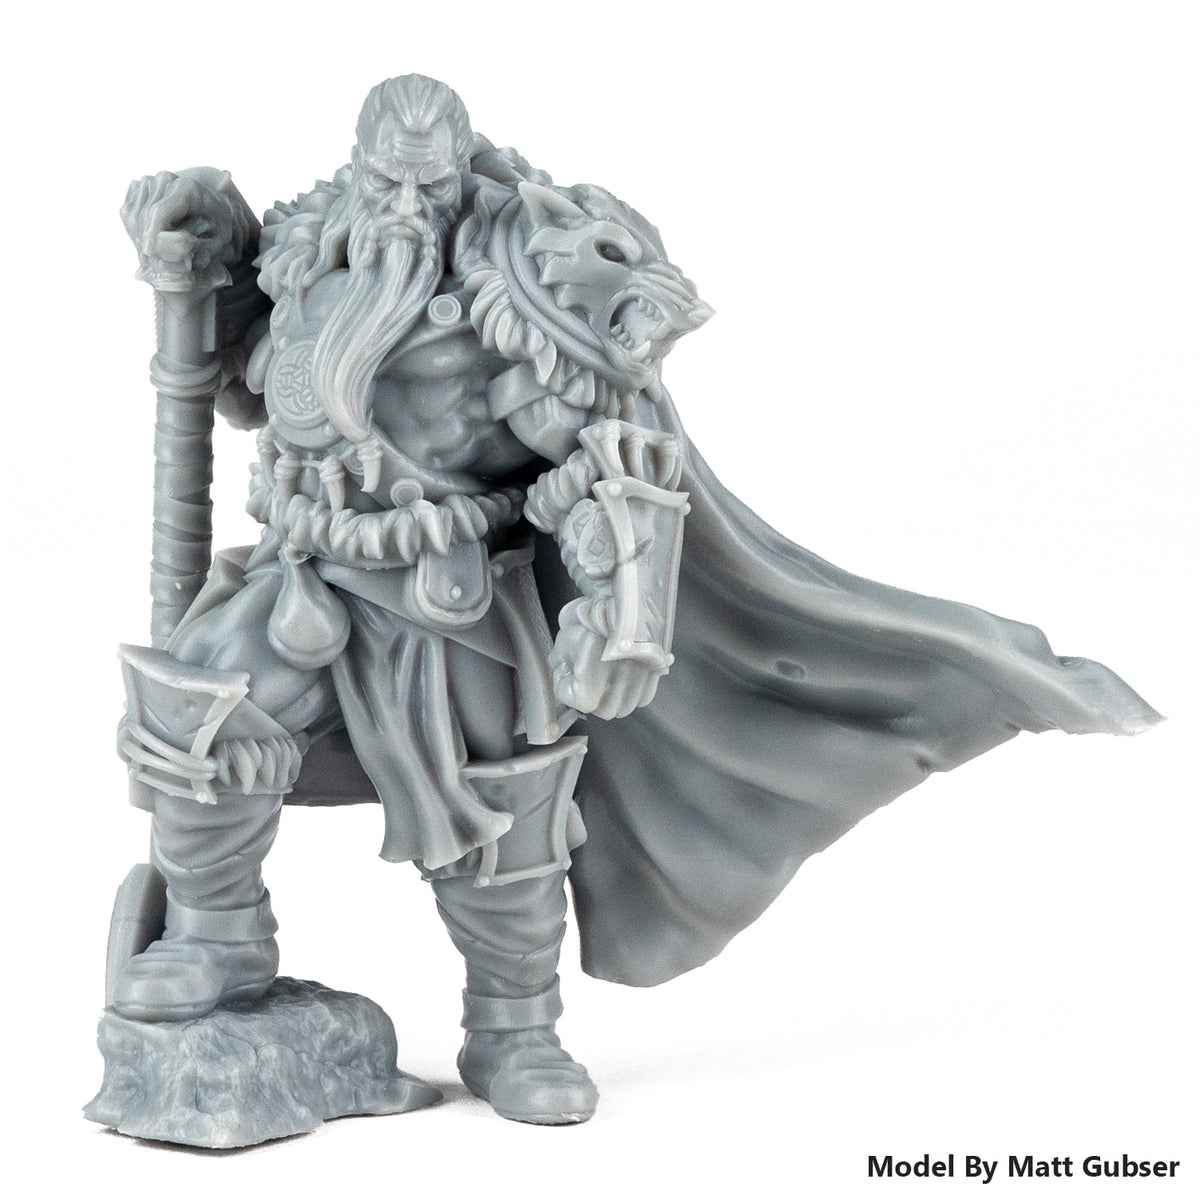
- Unmatched High Resolution: Printed on desktop liquid resin printers, this material captures microscopic structures, prongs, and bezel settings that an FDM printer could never achieve.
- Simplified Burnout Schedules: Siraya Tech's formulation ignites easily around 450°C and works seamlessly with standard jewelry investment powders. You do not need to buy expensive high-expansion "plasticast" plasters.
Comparison: FDM Casting vs. Resin Casting
| Feature Comparison | Lost PLA Casting (FDM) | Castable Resin Casting (LCD/SLA) |
|---|---|---|
| Best Application | Large statues, mechanical car parts, bulk items. | Resin Casting Jewelry, dental crowns, miniatures. |
| Surface Finish | Matte with visible layer lines; requires heavy sanding. | Flawlessly smooth; immediate injection-molded appearance. |
| Burnout Quality | PLA expands slightly; can leave carbon ash residue. | Wax-based formula melts cleanly with zero ash. |
| Material Cost | Highly affordable ($20-$30 per kg spool). | Premium investment, but yields higher-value commercial goods. |
If you are an artisan transitioning from traditional hand-carved wax to a digital CAD workflow, mastering these materials is vital.
Ensure you consult the official Castable - Cast Resin User Manual to dial in your exact curing times and burnout schedules.
For further inspiration on modernizing your craft, read our artisan showcase: From Wax to Wow: Perfecting Your Jewelry Art.
Conclusion
Lost PLA casting is a remarkable, highly rewarding manufacturing process that democratizes metalworking for the modern maker.
By utilizing an FDM 3D printer, specialized high-heat equipment, and rigorous safety protocols, you can transform simple plastic spools into heirloom-quality metal objects.
While PLA serves as a fantastic entry point for larger artistic and functional casts, those seeking commercial perfection, pristine surface finishes, and zero-ash burnouts should migrate to dedicated castable resins.
Whether you are pouring your first aluminum ingot or launching a bespoke jewelry line, mastering the investment casting workflow opens up a world of permanent, durable design.
Shop UV Resins & FDM Filaments
Explore More

FAQs About Lost-PLA Casting
What is the best filament for lost PLA casting?
While standard PLA is the most common and cost-effective choice, premium casting-specific filaments like Polycast are highly recommended. These specialty filaments are formulated to burn out of the plaster mold cleanly, leaving significantly less carbon ash behind compared to generic PLA.
Can I use a microwave or standard oven for burnout?
No, standard household ovens max out around 260°C (500°F), which is not nearly hot enough to completely incinerate PLA plastic or cure investment plaster properly. You must use a dedicated, programmable electric kiln or a gas-powered foundry capable of reaching and holding temperatures upwards of 700°C (1,300°F).
Do I need a vacuum chamber for investment casting?
While you can technically cast without one, a vacuum chamber is highly recommended for professional results. Plaster investment naturally traps microscopic air bubbles during the mixing process. If these bubbles adhere to your 3D model, they will fill with molten metal, resulting in ugly metal spikes and nodules on your final cast.
How do you smooth PLA prints before casting?
Because the metal will replicate every microscopic flaw on your model, surface smoothing is critical. You can mechanically wet-sand the PLA, starting with 120-grit sandpaper and moving up to 1000-grit. Alternatively, using an ultra-high-resolution material like Siraya Tech Castable Resin bypasses the need for manual sanding entirely.
Can I cast steel or iron at home?
It is highly discouraged for home hobbyists to attempt casting steel or iron. Steel requires astronomical melting temperatures exceeding 1,370°C (2,500°F), which standard backyard propane furnaces and graphite crucibles cannot safely withstand. Beginners should strictly stick to metals with lower melting points, such as aluminum, brass, bronze, copper, or silver.