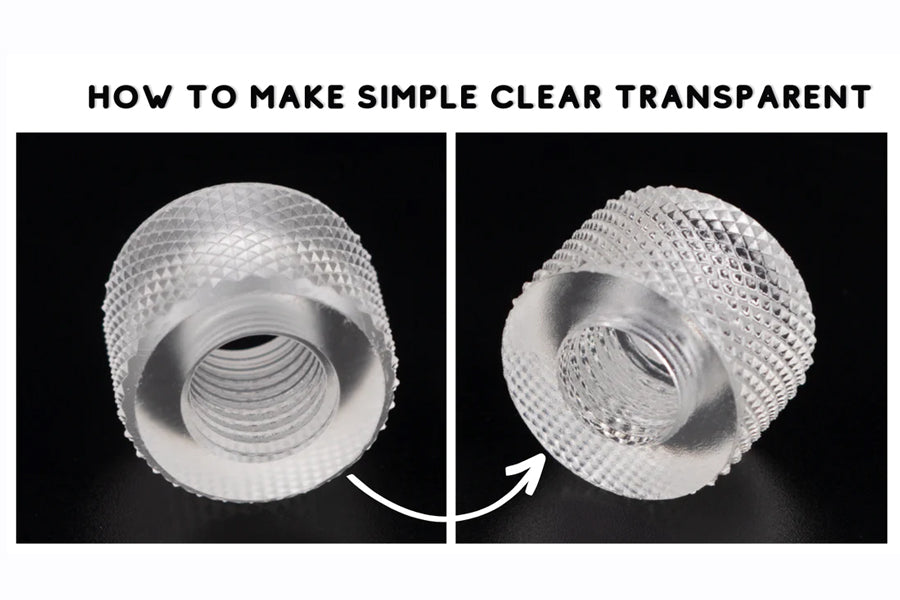
When working with 3D resin prints and silicone molds, achieving clarity, durability, and smooth finishes often requires more than just post-curing.
By following a few proven 3D resin and silicone tips, you can improve transparency, reduce defects, and extend the lifespan of your prints and molds.
General 3D Resin and Silicone Tips
- Resin Tips: Always dry resin prints fully before coating, use a UV curing station for even curing, and sand progressively with fine-grit sandpaper before applying coatings for maximum clarity.
- Silicone Tips: When making silicone molds for resin prints, degas the silicone to remove bubbles, dust-proof your workspace, and use mold release spray to extend mold life.
- Combined Tip: Ensure resin prints are fully cured before pouring silicone over them to avoid inhibition or sticky surfaces.
To make prints made with Simple Clear resin transparent after cleaning, you can follow these steps:
Step 1: Clean the Prints
Clean the prints made with Simple Clear resin using a mild soap and water solution. Rinse them thoroughly with water and allow them to dry completely.
Step 2: Prepare the Surface
Before you begin, ensure that the surface of the prints is clean and dry. Use a hair dryer to remove any water droplets on the surface until it is completely dry.
Step 3: Apply a Water-Based Coating
Apply a thin layer of water-based coating with a spray gun. Make sure to apply it thinly and evenly. Allow it to dry naturally at room temperature for about 2 minutes.
Step 4: Repeat the Coating Process
Repeat the coating process two more times, applying thinly every 2 minutes, and then let it dry naturally at room temperature. You can do multiple spraying operations until the transparency meets your expectations. We repeated this operation about three times, a total of 6 minutes.
Step 5: Inspect the Prints
Inspect the prints to ensure that they are transparent to your liking. If you are satisfied with the level of transparency, your prints are now ready to use.

Note:
It is important to dry the prints completely before applying the water-based coating to ensure proper adhesion.
Avoid using lacquer-based coating agents as they dry too quickly, and the solvent will evaporate before penetrating the interior.
Do not use a heating drying oven as it can affect the transparency of the prints. Allow the water-based coating to penetrate the resin as much as possible, delay the drying process and penetration speed, fully penetrate and improve transparency.
This method is provided by @Kazuhisa SHOUSHIN
Frequently Asked Questions
How do I make resin prints look crystal clear?
To make resin prints crystal clear, start by sanding the surface with progressively finer grits of sandpaper, then polish with a plastic polish or clear coat.
Ensure the print is fully cured and dry before applying any coatings. A thin, even layer of water-based coating can greatly enhance transparency without yellowing.
What are the best tips for using silicone molds with resin prints?
When using silicone molds, always degas the silicone before pouring to remove air bubbles that could distort details.
Apply a mold release spray to prevent sticking and extend mold life. Make sure resin prints are fully cured and clean before molding to avoid chemical inhibition.
Why does my silicone mold stick to resin prints?
Silicone molds may stick to resin prints if the resin isn’t fully cured or if no mold release agent is used. Uncured resin can chemically bond with silicone, making demolding difficult.
Using a proper release spray and ensuring complete curing will prevent sticking issues.
Can I use water-based coatings on silicone molds?
Water-based coatings are safe for resin prints but not typically used on silicone molds. Silicone’s nonstick surface prevents most coatings from bonding effectively.
Instead, focus on keeping molds clean, dry, and properly stored to extend their usability.


4 comments
zack
What water based coating do you recommend? a little more specificity as to what kind of coating you should apply would be helpful
“water based” coating is very vague.
MG
It does not need to be cured first before sealing? Only water-washed?
Lee
What type of water based sealant do you suggest?
Doug Bowman
What variety of coating agent do you recommend for this?