
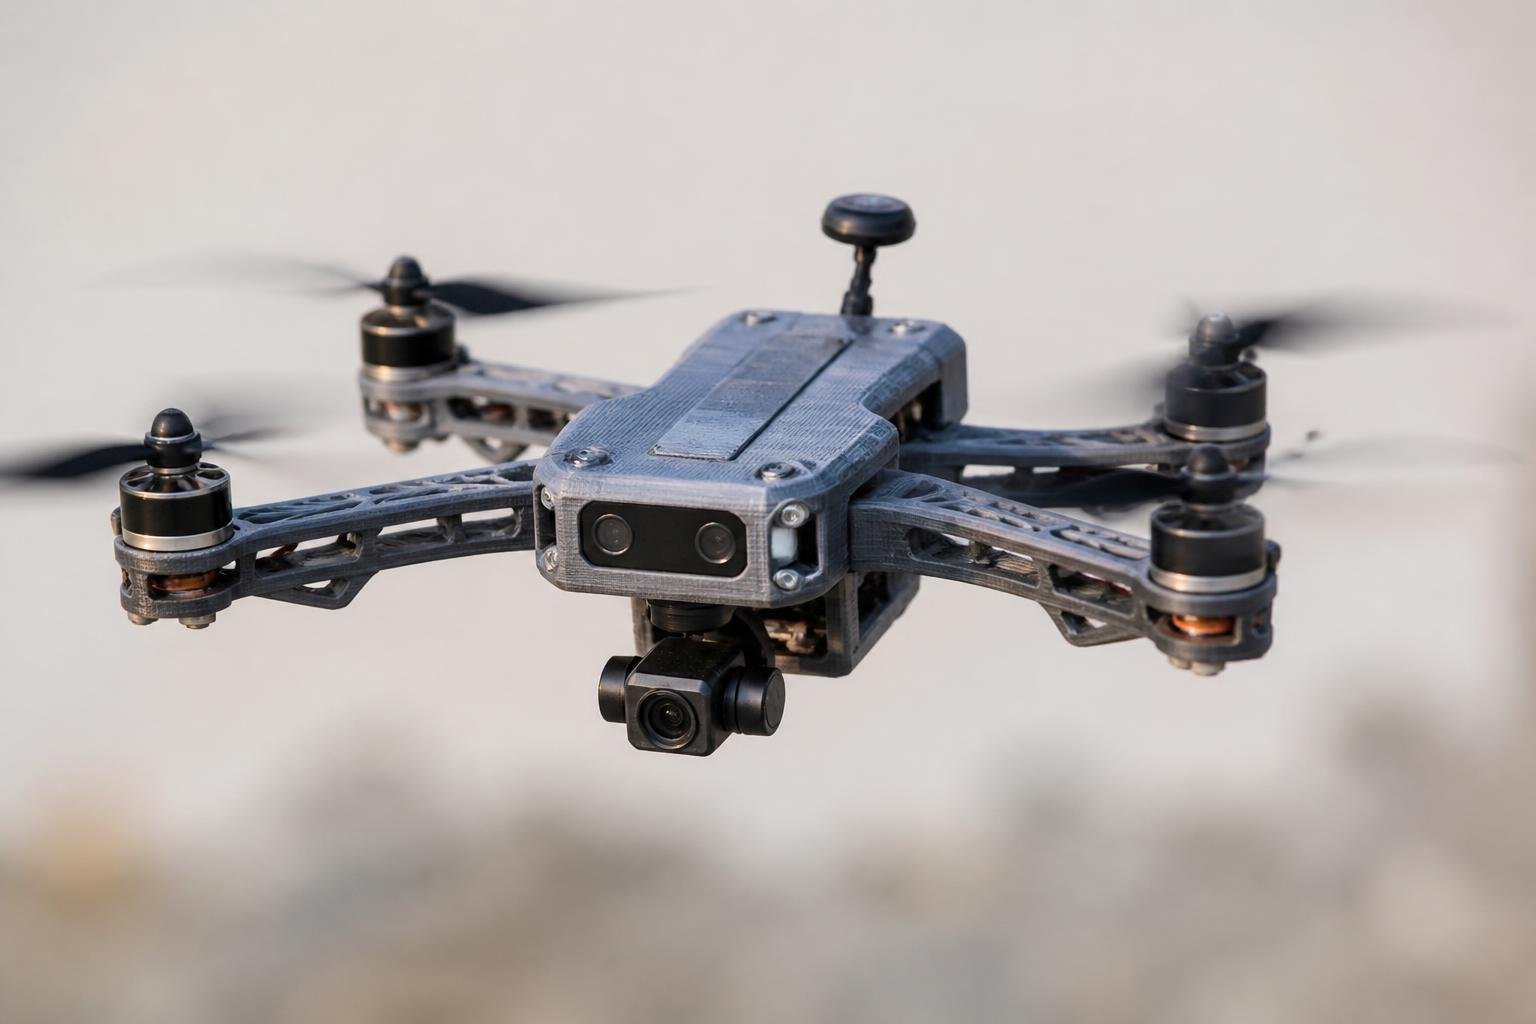
Printing your own frame means you can customize arm length, camera angle, mounting patterns, and replace crashed parts in hours rather than waiting days for shipping.
This guide covers filament selection by component, design principles, slicer settings, and the electronics you need to actually get airborne.
- Best frame material: Carbon fiber reinforced nylon is the strongest choice, but PETG works well for most hobby builds.
- TPU is non-negotiable: Camera mounts and motor bumpers need flexible TPU to absorb vibration and survive crashes.
- Walls over infill: Print drone arms with at least 4–6 wall loops — walls give more strength than infill percentage.
- Layer height matters: Use 0.15–0.2mm for structural parts to maximize inter-layer adhesion.
- Never print propellers: They can't be balanced precisely enough and risk catastrophic failure at high RPMs.
- Modular designs win: Replaceable arms mean a single reprint after a crash, not a full rebuild.
Why 3D Print a Drone Frame?

Commercial frames lock you into fixed geometries, mounting patterns, and component layouts. When you print your own, those constraints disappear.
- Custom camera mounts sized exactly for your FPV unit or action camera.
- Frame geometry matched to your flying style — tight racing or smooth long-range cruising.
- Replacement parts available in hours, not days.
- Lower cost per frame than machined carbon fiber, especially for experimental builds.
- Multi-material designs combining rigid frames with flexible bumpers.
The trade-off: plastic frames are less rigid than carbon fiber. For most hobby builds and recreational flying, this is perfectly acceptable.
Choosing the Right Filament for Each Part
Smart builders use different filaments for different components based on the stresses each part faces. One material doesn't fit all.
Frame and Arms
The frame carries motors, batteries, and electronics — so it needs high strength and low weight. Carbon fiber reinforced filaments are the top choice for structural drone parts.
Siraya Tech's PET-CF filament combines PETG-level printability with the added stiffness of carbon fiber reinforcement — practical for frames without needing a fully enclosed printer. For maximum rigidity, PPA-CF delivers nylon-level toughness with carbon fiber stiffness, ideal for arms and structural plates that need to survive hard landings.
Avoid PLA for any structural part. It's brittle on impact and softens in direct sunlight — both common conditions for drones.
Camera Mounts and Bumpers
TPU is the right choice for vibration-sensitive parts. Camera mounts printed in TPU absorb high-frequency vibrations that cause "jello" in FPV footage.
Siraya Tech's Flex TPU 95A prints smoothly on direct-drive extruders and offers excellent shock absorption for motor bumpers, antenna mounts, and landing gear.
Electronics Housings
Standard PETG or ABS works well for VTX mounts and ESC housings. These parts don't take direct impact, but need to handle heat from electronics during flight. Include ventilation holes in your design to keep components cool.
Design Principles for a Strong Frame
A poorly designed frame will flex, vibrate, and crack. These guidelines help you build a frame that survives real flights and crash landings.
Arm Thickness
Aim for 4–6mm thick arms when printing in plastic. Unlike carbon fiber, 3D printed materials need extra cross-section to achieve adequate rigidity. Walls contribute far more to structural strength than infill, so set at least 4–6 wall loops.
Layer Height and Temperature
Use 0.15–0.2mm layer height for structural parts. Lower layer height increases surface contact between layers and improves inter-layer adhesion — the weakest point in any FDM print.
Print at the higher end of your filament's recommended temperature range. Hotter plastic bonds better between layers.
Modular vs. Unibody
Modular designs with replaceable arms let you reprint and swap a single crashed arm rather than the entire frame. Unibody designs are simpler to assemble but harder to repair.
Slicer Settings That Matter
Getting your slicer settings right is as important as choosing the right filament. Here are the critical parameters for drone components.
| Setting | Frame / Arms | TPU Mounts |
|---|---|---|
| Wall count | 4–6 perimeters | 3–4 perimeters |
| Layer height | 0.15–0.2mm | 0.2mm |
| Infill | 20–30% (gyroid or cubic) | 15–20% |
| Print speed | 40–60 mm/s | 20–30 mm/s |
| Temperature | High end of range | Per filament spec |
For carbon fiber filaments, reduce retraction to prevent nozzle clogs from abrasive fibers. For TPU, enable "avoid crossing perimeters" to minimize stringing.
Essential Electronics You'll Need to Buy
The 3D printed frame is only half the build. Electronics must be purchased — they can't be printed.
- Brushless motors sized for your frame (2204–2306 for 5-inch builds)
- 4-in-1 ESC matched to your motor requirements
- Flight controller with gyro and accelerometer (F4 or F7 processor)
- FPV camera and video transmitter
- Propellers — always buy extras
- LiPo battery (4S 1300–1500mAh for 5-inch racing)
- Radio receiver compatible with your transmitter
3D printed propellers cannot be balanced precisely enough and may shatter under the high RPMs of drone motors. Always use commercially manufactured propellers. This is a safety issue — not a performance preference.
Common Mistakes to Avoid
Even experienced builders make these errors on their first printed drone.
- Printing too fast. Speed kills layer adhesion. Slow down for structural parts.
- Using PLA for the frame. It cracks on impact and warps in sunlight.
- Wrong print orientation. Arms should be printed flat to maximize layer adhesion in the direction of stress.
- Skipping the dry box. Nylon and TPU absorb moisture fast. Wet filament produces weak prints with poor layer bonding.
- Over-relying on infill. Add perimeters, not fill percentage, for strength.
First Flight Checklist
Before launching your build, verify everything is secure and configured correctly.
- All motor screws are tight and arms show no flex when gripped.
- Control surfaces move in the correct direction in your flight controller software.
- Throttle response tested on the bench before flying.
- Center of gravity matches design specs — an off-balance drone is dangerous.
- Battery fully charged and failsafe configured.
Start with gentle hovering before any aggressive maneuvers. 3D printed frames may flex differently than what you're used to, so take time to tune your PID settings for the specific frame.
Final Thoughts
Building a 3D printed drone lets you customize every detail of your aircraft while keeping costs low and repair times short. Choose the right filament for each component, focus on wall thickness over infill, and always test before flying aggressively.
Ready to pick the right material for your drone build? Browse Siraya Tech's carbon fiber filament and TPU filament collections to find the right match for every component.
Related Reading on Siraya
- Best Filament for Drone Parts
- Best Carbon Fiber Filament: Buyer's Guide
- What Is TPU Filament: Easy Guide
- Best Filament for Functional Parts
- Demystifying Fiber-Reinforced Filaments
Frequently Asked Questions
Can you 3D print an entire drone?
You can 3D print the frame, camera mounts, bumpers, and housings. Electronics like motors, flight controllers, ESCs, and propellers must be purchased separately. The frame is the only fully printable structural component.
What is the best filament for 3D printing a drone?
Carbon fiber reinforced nylon is the strongest choice for frames. PETG is a great all-around option that's easier to print and doesn't require an enclosed printer. TPU is essential for vibration-dampening parts like camera mounts. Avoid PLA for any structural component.
How much does it cost to 3D print a drone?
A basic micro-drone costs around $50–100 including filament and electronics. A 5-inch FPV build runs $150–250 depending on component quality. The 3D printed frame itself typically costs under $5 in filament.
Is a 3D printed drone frame strong enough?
For hobby flying, recreational use, and micro-drones, yes. 3D printed frames in PETG or carbon fiber nylon handle normal crashes well. For competitive high-speed racing, machined carbon fiber frames are still preferred for maximum stiffness.
Can you 3D print drone propellers?
No — it's strongly discouraged. 3D printed propellers are nearly impossible to balance properly and can shatter under the high RPMs of drone motors. Always use commercially manufactured propellers for safety.
Do 3D printed drones need special slicer settings?
Yes. Use at least 4–6 wall loops, 0.15–0.2mm layer height, and 20–30% infill for structural parts. Print at the higher end of your filament's temperature range for better layer bonding. Slow print speed to 40–60 mm/s for frames.