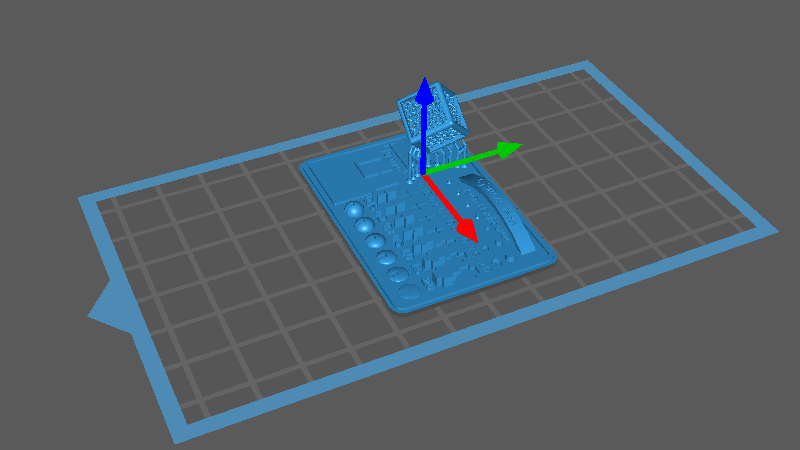
When working with resin-based materials, understanding the concept of resin shrinkage is crucial for achieving high-quality prints and minimizing defects.
As resin cures and transitions from a liquid to a solid state, it goes through a bit of a "shrinking" phase. But why do some manufacturers report sky-high shrinkage rates while others boast impressively low ones? This is where the plot thickens and we delve into the two ways shrinkage is measured: volume shrinkage and axial shrinkage.
What is Volume Shrinkage?
Volume shrinkage refers to the overall reduction in the volume of the resin as it cures. This type of shrinkage is a result of the polymerization process, where the molecular structure of the resin changes, causing it to occupy less space. Volume shrinkage is typically expressed as a percentage of the original volume of the liquid resin.
Simply put, the liquid components gradually get closer as the resin cures, occupying less space.
Why Volume Shrinkage Matters:
- Dimensional Accuracy: Significant volume shrinkage can lead to dimensional inaccuracies in the final print. This is particularly critical in applications requiring high precision, such as dental models or engineering prototypes.
- Surface Quality: Uneven shrinkage can cause surface defects, such as warping or distortion, affecting the aesthetic quality and functionality of the printed part.
- Stress and Cracking: High volume shrinkage can introduce internal stresses within the print, leading to cracking or delamination over time.
How to Manage Volume Shrinkage:
- Material Selection: Choose resins with lower volume shrinkage rates for applications requiring high precision.
- Print Design: Design parts with uniform wall thickness to minimize the effects of shrinkage.
- Post-Processing: Post-curing resin prints with UV light can ensure complete polymerization and reduce residual stress.
What is Axial Shrinkage?
Axial shrinkage refers to the reduction in dimensions along specific axes (X, Y, and Z) during the curing process.
Unlike volume shrinkage, which is a global measurement, axial shrinkage focuses on how the material contracts in different directions. This type of shrinkage can vary based on the orientation of the print and the properties of the resin.
Why Axial Shrinkage Matters:
- Dimensional Stability: Uneven axial shrinkage can lead to parts that are not dimensionally stable, with varying degrees of shrinkage along different axes.
- Fit and Assembly: For parts that need to fit together or interact with other components, axial shrinkage can cause issues with fit and alignment.
- Mechanical Properties: Variations in shrinkage along different Axes can affect the mechanical properties of the printed part, such as tensile strength and flexibility.
How to Manage Axial Shrinkage:
- Print Orientation: Optimize print orientation to reduce shrinkage effects along critical dimensions.
- Support Structures: Use support structures strategically to minimize deformation and maintain dimensional accuracy.
- Calibration and Testing: Regularly calibrate your printer and test for shrinkage to adjust settings accordingly.
Shrinkage of Siraya Tech resin
Siraya Tecg UV resins have about 6% shrinkage per volume (1.5-2 % per axis) when fully cured.
The only exception is Sculpt Ultra resin. It is composite with about 2.5% volume shrinkage when fully cured.
Build resin is another resin that is easier to print than Sculpt and shrinks more evenly than most model resins.
How to Reduce Print Shrinkage for More Accurate Models
To reduce print shrinkage and improve the accuracy of your models, you can take the following steps:
1. Choose the Right Material
- Low Shrinkage Materials: Select materials with lower shrinkage rates, such as PLA-Based, PETG-Based, or specialized low-shrinkage resins. These materials shrink less during curing, helping to improve dimensional accuracy.
- High-Quality Resins: Use high-quality resins that have been certified and tested for consistency and stability.
- Check out Siraya Sculpt Ultra White resin with only 2.5% volume shrinkage, for more accurate dimensions during printing.
2. Optimize Print Settings
- Reduce Print Speed: Slower print speeds allow the material more time to cure evenly, reducing shrinkage and deformation.
- Adjust Temperature: Ensure stable printing temperatures. Temperature fluctuations can affect the curing process and cause shrinkage.
- Layer Height: Choose an appropriate layer height. Smaller layer heights can enhance the detail and accuracy of the print but will increase print time.
3. Use Tolerance Compensation
- Tolerance Compensation Settings: Adjust tolerance compensation in your slicing software to offset potential errors during printing. Gradually adjust the compensation value and test to find the best setting.
Check out Chitubox Tolerance Compensation
- Calibrate the Printer: Regularly calibrate your printer to ensure accurate movement of the X, Y, and Z axes.
4. Improve Model Design
- Uniform Wall Thickness: Ensure uniform wall thickness in your model to avoid uneven shrinkage in different thickness areas.
- Add Support Structures: Add support structures where necessary to prevent deformation in overhanging parts and complex structures.
5. Control the Print Environment
- Temperature Control: Maintain a stable temperature in the print environment to avoid fluctuations that can impact the curing process.
- Humidity Control: High humidity can affect material performance, so keep the print environment dry.
6. Post-Processing
- Post-Curing: For resin prints, use UV light to post-cure the print to ensure the material is fully cured, reducing deformation over time.
7. Use Appropriate Slicing Software Settings
- Proper Infill Rate: Choose an appropriate infill rate to reduce material usage and lower the risk of shrinkage.
- Wall Thickness Settings: Adjust the wall thickness print settings in your slicing software to ensure sufficient strength and stability during the curing process.
By selecting the right materials, optimizing print settings, improving model design, controlling the print environment, and post-processing, you can significantly reduce print shrinkage and improve model accuracy. This not only enhances the quality of your prints but also ensures their reliability in various applications.
If you have any tips for accurate printing, please share them in the comments below!


1 comment
Farzinsabbagh
What do you mean by “movement of the X, Y, and Z axes” as there is no X and Y axes in resin 3D printing!