Clear Coat for Resin Prints
1 product
Showing 1 - 1 of 1 product
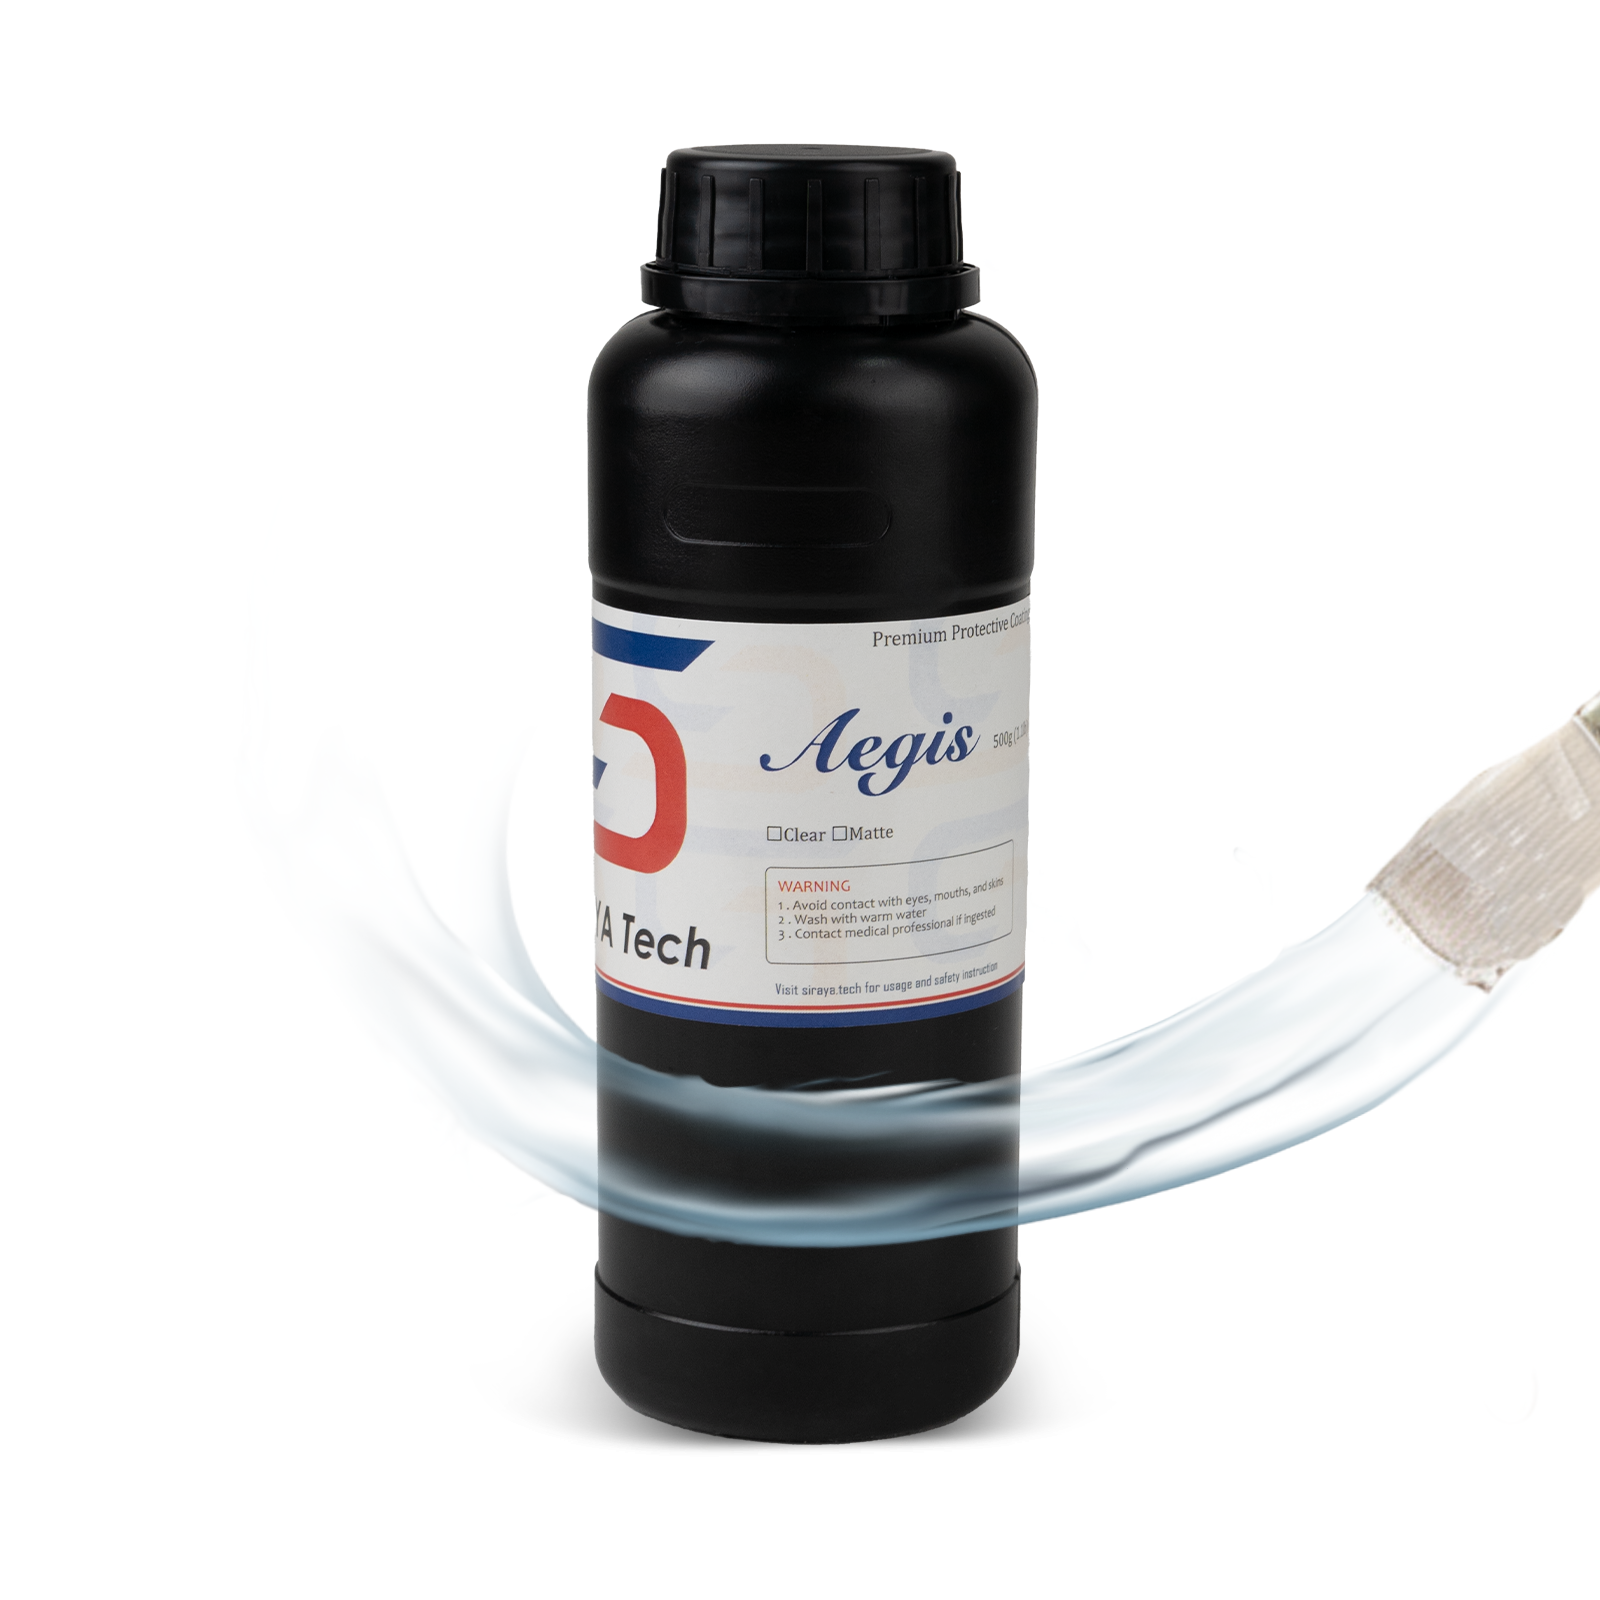
UV resin prints look their best straight off the build plate, but without protection that quality does not last. UV exposure yellows the surface, handling leaves scratches, and moisture works into micro-pores over time. Siraya Tech clear coat for resin prints solves all three problems in one fast step. Build Coat applies by brush, self-levels to a smooth high-gloss finish, and cures hard and water-clear in 2 to 5 minutes under a UV lamp — giving every resin print a professional, durable finish that holds up long after the print is done.
What Is Clear Coat for Resin Prints?
Clear coat for resin prints is a UV-curable protective surface coating applied over a finished and post-cured resin 3D print. Unlike spray lacquers or brush-on varnishes borrowed from other hobbies, a purpose-formulated UV clear coat for resin prints bonds chemically to the photopolymer surface, cures hard and transparent under a UV lamp in minutes, and delivers a level of surface protection and clarity that general-purpose coatings cannot match.
Resin prints leave the wash and cure station looking clean and detailed, but the surface at that stage is still vulnerable. The photopolymer material continues to react slowly with ambient UV light, causing progressive yellowing. The surface, while smooth to the touch, contains micro-level porosity that traps oils, dust, and moisture. And the base resin, however well formulated, has a fixed hardness that can be scratched or marked with regular handling.
A clear coat addresses all of these vulnerabilities in a single application step:
- UV barrier: Absorbs and blocks UV radiation before it reaches the base resin, dramatically slowing or preventing yellowing on clear, white, and light-colored prints.
- Surface seal: Fills micro-pores and seals the surface completely against moisture, handling oils, dust, and chemical contamination.
- Added hardness: Cures to a harder surface than most base resins, improving scratch resistance and handling durability.
- Optical clarity: Cures water-clear without tinting, hazing, or altering the color of the underlying print.
- Gloss restoration: Restores and enhances the surface gloss of prints that have been wet sanded or that show surface dullness from post-processing.
- Paint adhesion base: Provides a consistent sealed surface for acrylic primers and paints to adhere to evenly across the entire print.
Why Resin Prints Need Clear Coat
Resin prints are produced at much higher detail resolution than FDM prints and come off the build plate with a naturally smooth surface. This makes them look finished even without any post-processing beyond washing and curing. That appearance is misleading. At a functional level, an uncoated resin print is still significantly vulnerable compared to a properly finished and sealed print.
- UV yellowing: All photopolymer resins react to UV light. Standard resins begin showing visible yellowing within weeks of regular light exposure. Clear and water-white resins are especially susceptible. A UV-stable clear coat acts as a sacrificial barrier, absorbing the UV load before it reaches the base resin.
- Surface micro-porosity: Resin prints appear smooth but have micro-level surface pores that trap contaminants, skin oils from handling, and moisture. Over time these deposits cause surface staining, discoloration, and can accelerate surface degradation. Clear coat seals these pores completely.
- Scratch vulnerability: Most standard resins cure to moderate hardness but scratch relatively easily under regular handling. A hard UV clear coat layer adds meaningful surface hardness above the base resin, protecting fine surface detail and print lines from contact damage.
- Chemical sensitivity: Many standard resins are attacked by alcohols, common cleaning products, and skin chemistry over extended contact. A clear coat layer adds a chemical barrier between the base resin and these exposure sources.
- Display longevity: Display models, figurines, and scale prints are often handled repeatedly and displayed under lighting that includes UV components. Without clear coat, these prints degrade visibly over months. With clear coat they hold their original appearance for years.
- Functional part durability: Resin prints used as functional parts — enclosures, brackets, handles, jigs — are exposed to the full range of environmental stresses. A hard clear coat extends the functional life of these parts significantly.
Siraya Tech Clear Coat Products for Resin Prints
Siraya Tech offers a clear coating system built specifically for resin 3D prints, with options to match the protection level required for each application:
Siraya Tech's purpose-formulated UV clear coat for resin prints. Self-leveling, water-clear, and fast-curing. Apply by brush or pour, allow to self-level for 30 to 60 seconds, then cure under UV in 2 to 5 minutes. Delivers a hard, high-gloss, water-clear protective surface on SLA, DLP, and MSLA resin prints of all types.
Shop Build CoatApplied as a thin coating layer over rigid resin prints, Tenacious adds a tough, flexible outer shell that absorbs impacts rather than cracking or chipping. Ideal as a base coat under Build Coat for functional parts, wearable prints, props, and enclosures that may be dropped or subjected to mechanical stress in use.
Shop TenaciousApply a thin layer of Tenacious first as a flexible impact-absorbing base coat, then apply Build Coat over the top for a hard, glossy, UV-protective finish. This two-layer system delivers the best all-round protection — impact resistance from the Tenacious layer and surface hardness, UV protection, and optical clarity from the Build Coat layer.
Shop Build CoatHow to Apply Clear Coat to Resin Prints: Step-by-Step
What you need: Siraya Tech Build Coat · Soft brush or foam applicator · UV lamp (365nm to 405nm) · Nitrile gloves · Fresh isopropyl alcohol (IPA) · Optional: 400 to 800-grit wet/dry sandpaper for pre-sanding
- Step 1 — Confirm full post-cure: The resin print must be completely post-cured before applying any clear coat. Applying clear coat over a partially cured print causes adhesion failure, surface wrinkling, and inhibited cure in the coating layer. Post-cure the print for the full recommended time under your UV curing station before proceeding.
- Step 2 — Clean the surface: Wipe the fully cured print with fresh isopropyl alcohol (IPA) using a lint-free cloth or paper towel to remove surface contamination, handling oils, and any residual wash solution. Allow to dry completely before proceeding. Surface contamination is the most common cause of adhesion failure when clear coating resin prints.
- Step 3 — Optional wet sand: For display models or presentation prints where the smoothest possible finish is required, wet sand the cured print with 400-grit then 800-grit wet/dry sandpaper before coating. Wet sanding removes fine print lines and surface variation and gives the coating an optimal surface to bond to. Wipe again with fresh IPA after sanding and allow to dry fully before coating.
- Step 4 — Apply the clear coat: Wearing nitrile gloves, apply a thin, even layer of Build Coat using a soft brush or foam applicator. Work in smooth, consistent strokes in one direction to minimize brush marks and air bubbles. On prints with fine surface detail, use a soft brush with light pressure to avoid flooding recessed details with excess coating resin. Allow the coating to self-level for 30 to 60 seconds before curing.
- Step 5 — Remove surface bubbles: If surface bubbles appear after application, pass a heat gun or lighter 10 to 15 cm above the surface for 1 to 2 seconds. The brief heat pops bubbles and allows the coating to re-level. Do not overheat — resin prints can warp at elevated temperatures, particularly thin-walled or flat prints.
- Step 6 — Cure under UV: Place the coated print under a UV lamp for 2 to 5 minutes. Rotate the print periodically to ensure all surfaces receive direct UV exposure, including undersides, recesses, and overhangs on complex geometry.
- Step 7 — Inspect and apply second coat if needed: After curing, inspect the surface under good lighting. For the most consistent gloss and best long-term protection, apply a second thin coat and cure again. Two coats fully seal all remaining micro-surface variation and give a deeper, more uniform finish than a single coat alone.
- Step 8 — Final cure: Give the finished print a final full UV cure of 3 to 5 minutes after the last coat to ensure the coating is completely hardened throughout before handling, display, or use.
Clear Coat for Resin Prints vs Other Finishing Options
Several finishing options are used on resin prints. Here is how UV clear coat compares to the most common alternatives:
| Finishing Method | Pros | Cons | Best For |
|---|---|---|---|
| UV clear coat (Build Coat) | Cures in 2 to 5 minutes, water-clear, seals surface, adds UV protection and hardness, compatible with painting | Requires UV lamp, adds slight surface thickness over very fine detail | All resin prints — display models, functional parts, clear prints, miniatures, painted models |
| Spray lacquer clear coat | Easy to apply, widely available, matte and gloss options | Limited UV protection, long dry time, poor chemical bonding to resin surface, solvent fumes | Quick finishing of non-critical display prints where long-term protection is not required |
| Epoxy resin coating | Very thick, hard, high-gloss finish, excellent surface build | Cure time of 12 to 48 hours, difficult to apply thinly without drips, heavy, expensive | Decorative objects and art pieces where thick surface build and extreme gloss are desired over fine detail preservation |
| Brush-on varnish (acrylic) | No UV lamp needed, matte/satin/gloss options, low cost | No chemical bond to resin, peels over time, limited UV and moisture protection, long dry time | Temporary protection on painted miniatures where the varnish is applied over acrylic paint layers |
| No finish / uncoated | No time or cost investment | No UV protection, yellows rapidly, scratches easily, absorbs oils and moisture, limited display life | Prototype prints and test prints not intended for long-term display or use |
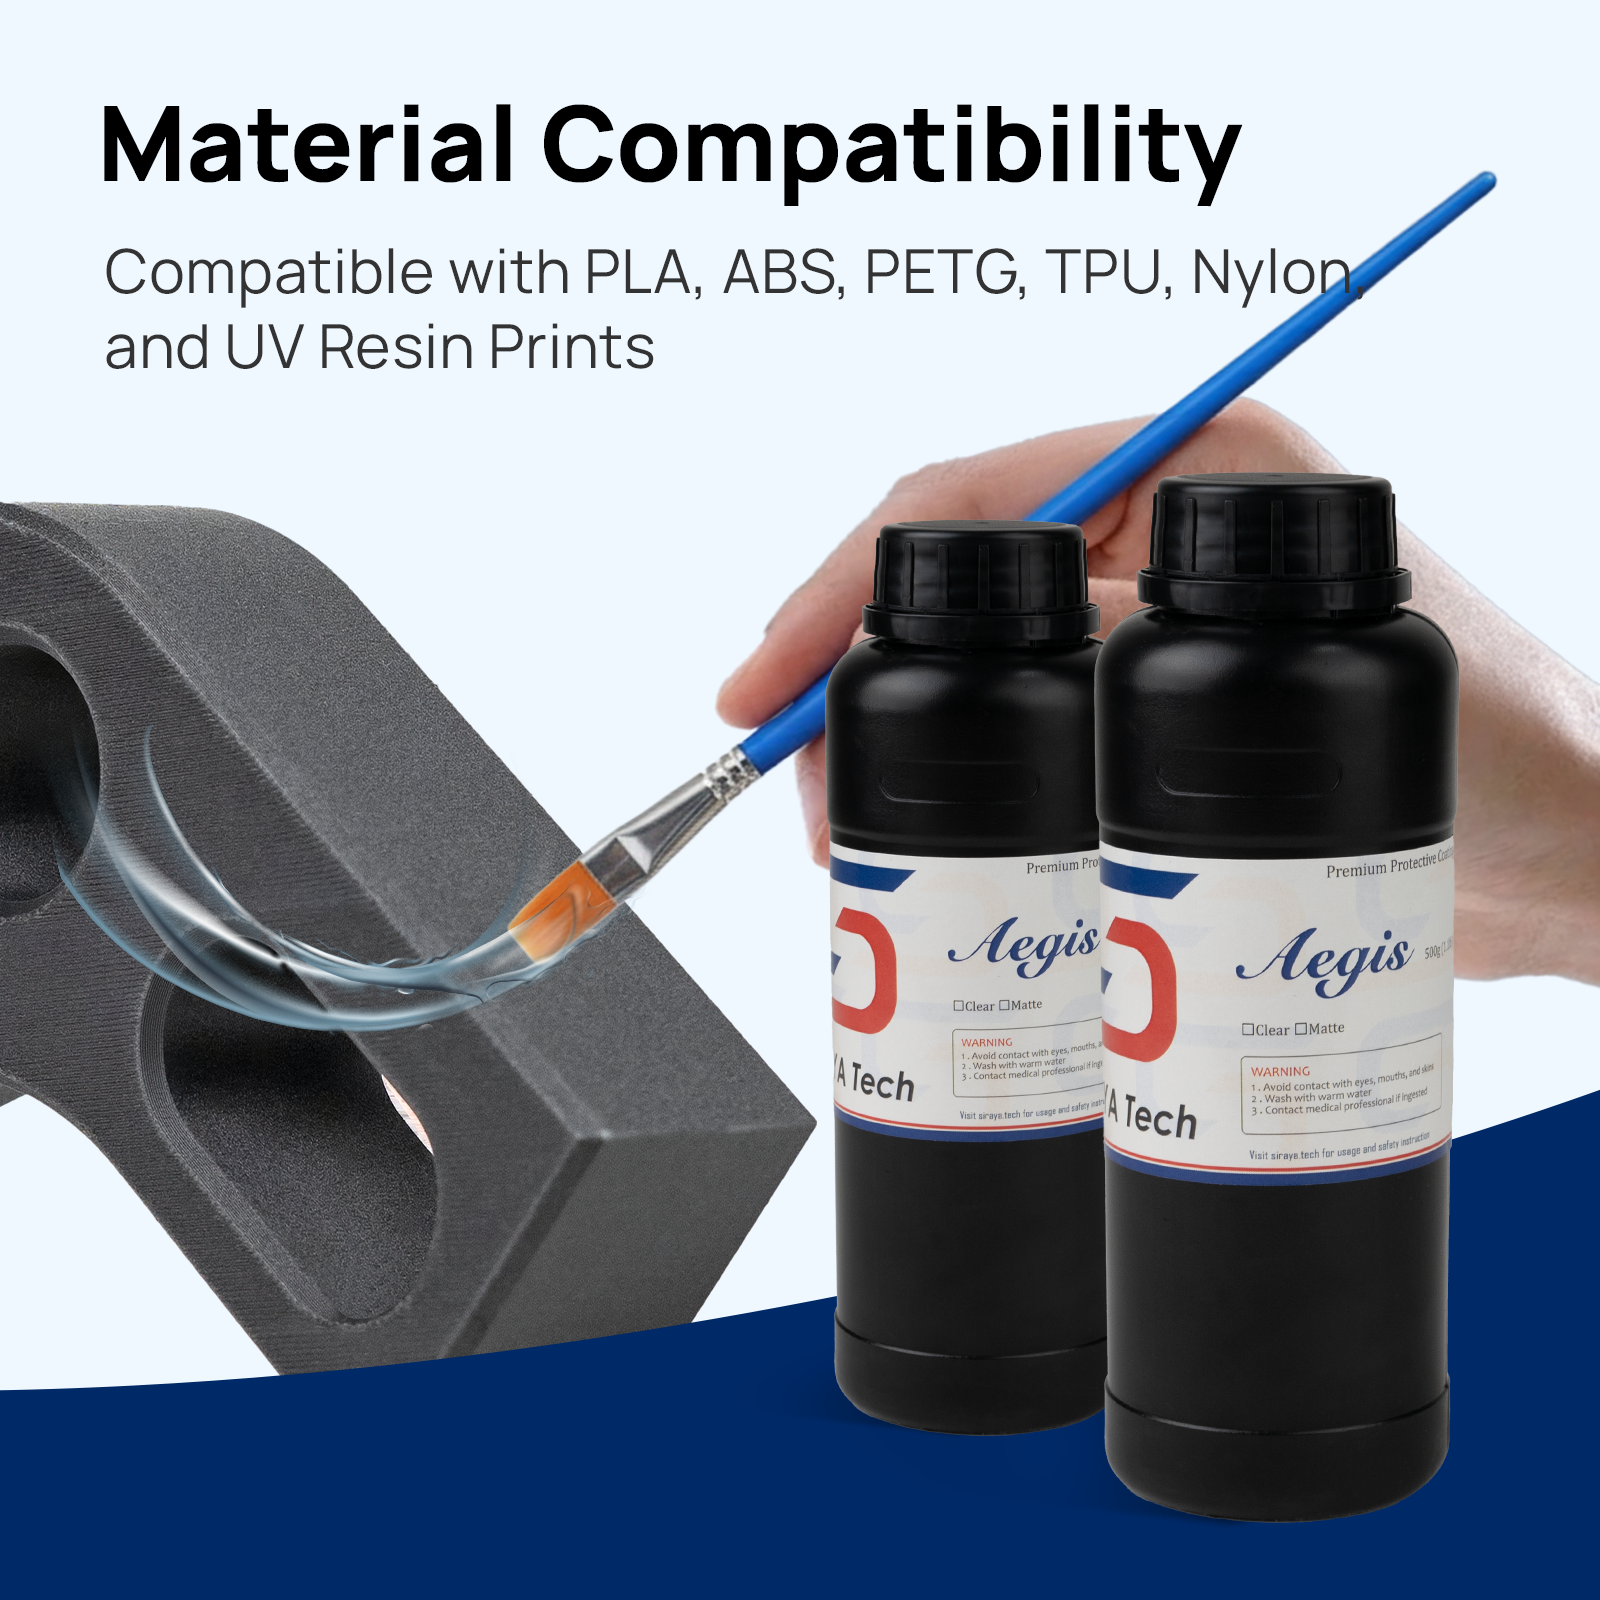
Resin Type Compatibility with Build Coat
Build Coat is compatible with the full range of Siraya Tech resin families and with most third-party UV resins. The table below shows compatibility across common resin types:
| Resin Type | Compatible | Surface Prep Required | Notes |
|---|---|---|---|
| Standard resins (Fast, Blu, Day) | ✔ Yes | IPA clean only | Excellent adhesion, full gloss, ideal application |
| ABS-like resins (Blu, ABS-like formulas) | ✔ Yes | IPA clean only | Strong adhesion, adds surface hardness above base ABS-like resin hardness |
| Flexible / elastic resins (Tenacious, stretch formulas) | ⚠ Conditional | IPA clean + thin coat | Apply very thin coat only — thick coating over flexible resin may crack during flexion |
| Clear / water-white resins (Blu Clear, Crystal) | ✔ Yes | IPA clean + optional sand | Highly recommended — significantly slows UV yellowing on clear prints |
| Engineering resins (high-temp, tough formulas) | ✔ Yes | IPA clean + light abrasion | Light sanding improves adhesion on very smooth high-density engineering resin surfaces |
| Castable / wax-blend resins | ✖ No | N/A | Wax surface components inhibit UV coating adhesion — not recommended |
| Dental / biocompatible resins | ⚠ Conditional | Consult resin manufacturer | Biocompatibility status of finished part changes when clear coat is applied — verify with resin manufacturer before use in clinical applications |
| Third-party standard resins | ✔ Yes | IPA clean + test patch | Apply a small test patch on an inconspicuous area first to confirm adhesion before full application |
Build Coat Technical Specifications
| Property | Specification |
|---|---|
| Coating Type | UV-curable photopolymer clear coat |
| Compatible UV Wavelength | 365 nm to 405 nm |
| Cure Time (UV Lamp) | 2 to 5 minutes (varies by lamp intensity and distance) |
| Finish | High gloss, water-clear |
| Color After Cure | Optically clear — no tinting, hazing, or yellowing |
| Application Method | Brush, foam applicator, or controlled pour |
| Self-Leveling Time | 30 to 60 seconds after application |
| Recommended Coats | 1 to 2 coats for standard protection; 2 to 3 coats for maximum durability |
| UV Protection | Yes — UV-absorbing formulation protects base resin from ambient UV exposure |
| Surface Hardness | Higher than standard SLA/DLP resins — improves scratch resistance |
| Moisture Resistance | Excellent — seals surface against moisture infiltration |
| Chemical Resistance | Good — resistant to mild chemicals, handling oils, and cleaning agents |
| Compatibility | SLA, DLP, MSLA resin prints — all standard photopolymer formulations |
| Storage | Cool, dark location away from UV light — reseal bottle tightly after each use |
| Shelf Life | 12 months from manufacture date when stored correctly |
| Safety | Use nitrile gloves — uncured resin is a skin sensitizer. Cure all material completely before skin contact. |
Clear Coat for Resin Prints: Common Applications
- Display models and scale models: Clear coat locks in the surface quality of display-grade prints and prevents the yellowing and surface degradation that would otherwise become visible within weeks under room lighting and ambient UV.
- Miniatures and tabletop gaming figures: Applied over completed acrylic paint schemes, clear coat seals the paint layers and protects the model surface during repeated handling at the gaming table. Use a thin coat to preserve fine painted detail without flooding fine lines.
- Clear and translucent prints: Clear resin prints are highly susceptible to UV yellowing and surface scratching. Clear coat is essentially mandatory for any clear or water-white print that is intended to remain optically clear in display or functional use.
- Jewelry and wearable prints: Resin jewelry and wearable prints are in constant contact with skin, cosmetics, and moisture. Clear coat seals the surface and adds a hard protective shell that resists the chemical and mechanical stresses of daily wear.
- Architectural models: Architectural and product design models benefit from the hard, consistent surface that clear coat provides, both for handling during presentations and for long-term archival storage.
- Functional enclosures and brackets: Functional resin parts used in equipment, electronics enclosures, and mechanical assemblies benefit from the added surface hardness and moisture resistance that clear coat provides, extending the operational life of the printed component.
- Props and cosplay: Large-format resin props and cosplay components are handled extensively, transported, and exposed to outdoor lighting. Clear coat protects the surface finish and maintains appearance through extended use.
- Pre-paint sealing: Applied before painting, clear coat provides a sealed, chemically consistent surface for primer and acrylic paint to adhere to evenly across the entire print, eliminating the variable absorption rates between different surface zones of an uncoated print.
Pro Tips for the Best Clear Coat Finish on Resin Prints
Thin coats always outperform thick coats. Multiple thin coats with full UV cure between each coat produce a harder, clearer, more even finish than a single thick coat. A thick coat traps bubbles, sags on vertical surfaces, and cures unevenly — especially on complex geometry with varying surface angles relative to the UV lamp.
- Temperature matters: Apply clear coat at room temperature (18°C to 28°C). Cold coating resin is more viscous, self-levels poorly, and traps more bubbles. If working in a cold environment, warm the Build Coat bottle in a warm water bath for 5 minutes before use.
- Avoid direct sunlight during application: Apply clear coat in a UV-shaded workspace. Brief ambient UV exposure begins curing the coating before it has fully self-leveled, resulting in an uneven, textured surface rather than a smooth gloss finish.
- Rotate during cure: For prints with complex geometry, rotate the print at least once during the UV cure cycle to ensure even cure on all surfaces. Areas that receive insufficient UV exposure will remain tacky and under-cured.
- Use a dedicated brush: Keep a clean, soft-bristle brush dedicated to clear coat application. Contamination from previous paint or material use in the brush will transfer to the clear coat layer and appear as visible inclusions or haze after curing.
- Sand between coats for glass-smooth results: For the highest-quality finish on display pieces, wet sand with 1000-grit between coats to remove any micro-texture, dust inclusions, or brush marks from the previous coat before applying the next layer. Wipe with IPA and allow to dry fully before applying the next coat.
- Seal recesses carefully: On prints with deep recesses, engraved text, or fine panel lines, use a fine-tip brush to work clear coat into recessed areas before applying the overall coat. This prevents air pockets from forming in recesses that the self-leveling coat cannot reach.
- Store correctly between uses: Reseal the Build Coat bottle immediately after use. Any UV exposure — including room lighting over extended periods — will begin to cure the coating resin in the bottle. Store in a dark cupboard or opaque container away from light sources.
- Test on scrap prints first: If working with a new resin type or a third-party resin not previously used with Build Coat, apply a test coat on a scrap print or the underside of the actual print first. Confirm full adhesion and cure before applying to the visible surfaces.
- Gloves at every step: Wear nitrile gloves throughout the entire application and cure process. Skin oils transferred from ungloved handling contaminate the surface and cause adhesion failure or visible fish-eye defects in the cured coating layer.
Troubleshooting Clear Coat on Resin Prints
| Problem | Likely Cause | Solution |
|---|---|---|
| Tacky surface after curing | Insufficient UV exposure — under-cured coating layer | Return print to UV lamp for an additional 3 to 5 minutes. Rotate print to expose all surfaces. Check UV lamp output — lamps degrade over time and may require replacement. |
| Hazy or cloudy finish | Moisture contamination on surface before application, or coating applied in high-humidity environment | Strip coating with IPA, re-clean surface thoroughly, and allow to dry completely. Apply new coat in a dry environment below 60% relative humidity. |
| Fish-eye or cratering | Surface contamination — skin oils, silicone, or mold release agent on print surface | Strip coating, clean surface aggressively with fresh IPA and lint-free cloth, allow to dry fully, and reapply. Ensure nitrile gloves are worn throughout. |
| Bubbles in cured coat | Air trapped during application, or coating applied too thickly | Apply thinner coats with slower, smoother brush strokes. Pass heat gun briefly over wet coat before curing to pop surface bubbles. Allow longer self-leveling time before UV cure. |
| Coating peeling or delaminating | Insufficient surface cleaning, incompatible resin type, or base print not fully post-cured | Strip coating, confirm base print is fully post-cured, clean surface with fresh IPA, lightly abrade with 400-grit sandpaper, clean again, and reapply. Test compatibility on scrap print if using unfamiliar resin. |
| Uneven gloss — some areas matte, some glossy | Uneven application thickness or uneven UV cure across surface | Wet sand surface with 800-grit to even out, clean with IPA, and apply a fresh even coat. Ensure UV lamp illuminates all surface areas during cure by rotating print. |
| Wrinkling or orange peel texture | Coat applied too thick, or UV cure initiated before coating fully self-leveled | Allow 60 seconds of self-leveling time before UV cure. Apply thinner coats. If wrinkling has occurred, sand back, clean, and reapply thin coat. |
| Yellowing of clear coat over time | Extended UV exposure beyond coating's UV absorption capacity, or use of non-UV-stable coating product | Confirm Build Coat is being used — it is formulated with UV stabilizers. For prints in high UV environments, apply 2 to 3 coats for maximum UV barrier thickness. Recoat annually on long-term display pieces in bright environments. |
| Coating floods fine detail | Too much coating resin applied in one coat | Apply thinner coats using a fine-tip brush on detailed areas. Work coating into recesses and fine details with light brush strokes rather than flooding the surface. Multiple ultra-thin coats preserve detail better than one thick coat. |
Frequently Asked Questions — Clear Coat for Resin Prints
Do I need a UV lamp to use Build Coat, or will sunlight work?
A dedicated UV lamp is strongly recommended. Sunlight contains UV and will cure Build Coat, but outdoor curing is highly inconsistent — UV intensity varies with time of day, season, cloud cover, and geographic location, making cure time unpredictable. More importantly, applying Build Coat outdoors exposes the wet coating to dust, pollen, and air currents before it has cured, resulting in surface contamination inclusions in the finished coat. A 405nm or 365nm UV lamp in a controlled indoor environment gives consistent, repeatable results in 2 to 5 minutes.
Can I use Build Coat over acrylic paint on a resin print?
Yes. Build Coat can be applied over fully dried and cured acrylic paint layers on a resin print as a protective top coat. Ensure the acrylic paint is fully dry before applying Build Coat — typically 30 to 60 minutes minimum for standard hobby acrylic paints, longer for thick paint layers. Apply a thin coat to avoid lifting or disturbing the paint layer beneath. Build Coat applied over acrylic paint seals the paint against moisture, handling damage, and UV fading, and restores gloss to matte-painted surfaces.
How many coats of clear coat does a resin print need?
For standard protection on display models and decorative prints, two coats are recommended. The first coat seals the base resin surface and fills micro-porosity. The second coat builds surface hardness and gloss uniformity. For prints in high-handling or high-UV environments — jewelry, functional parts, outdoor-displayed models — three coats provide maximum protection. For quick prototype protection where appearance is not critical, one coat is sufficient. Always cure fully between coats.
Will clear coat make my resin print waterproof?
Build Coat significantly improves moisture resistance by sealing the surface micro-pores of the resin print. For splashes, rain exposure, and high-humidity environments, a fully coated print performs substantially better than an uncoated print. However, Build Coat is not formulated as a complete waterproofing system for submersion applications. For prints intended for prolonged water contact or submersion, additional waterproofing measures beyond clear coat should be applied, and the base resin should be selected for moisture resistance as well.
Can I apply clear coat to flexible resin prints?
Yes, with important limitations. Build Coat can be applied to flexible resin prints, but only in very thin coats. A thick rigid coating over a flexible base resin will crack and delaminate when the print flexes. Apply the thinnest possible coat — just enough to seal the surface — and cure fully. For prints that flex significantly in use, consider whether clear coating is necessary, as the cracking risk may outweigh the protection benefit for highly flexible geometries. For semi-flexible prints with limited flex range, thin Build Coat coats work well without cracking issues.
How long does clear coat protection last on a resin print?
With proper application of two or more coats of Build Coat, protection on a display model in normal indoor conditions lasts several years before any visible degradation. The UV protection layer in Build Coat is gradually consumed by UV absorption over time — in very high UV environments such as direct sunlight display, the coating may require reapplication after 12 to 18 months. In normal indoor display conditions away from direct sunlight, a well-coated print maintains its appearance for 3 to 5 years or more. Recoating is simple — clean the surface with IPA and apply a fresh coat over the existing coating.
Can I sand Build Coat after it has cured?
Yes. Cured Build Coat sands cleanly with wet/dry sandpaper. Use 800 to 1000-grit for between-coat sanding to remove micro-texture and dust inclusions, then apply the next coat over the sanded surface after cleaning with IPA. For a final polished finish after the last coat, wet sand progressively from 1000-grit through 2000-grit and finish with a polishing compound to achieve an optically clear, glass-smooth surface. This technique is particularly effective on clear resin prints and display-grade models where optical surface quality is a priority.
Is clear coat necessary if I am using a UV-resistant resin?
UV-resistant resins significantly reduce but do not eliminate UV yellowing, and they do not address the other vulnerabilities of an uncoated resin surface — micro-porosity, scratch susceptibility, and chemical sensitivity. For prints where long-term surface quality, handling durability, and optical clarity are important, clear coat remains recommended even over UV-resistant base resins. Think of UV-resistant resin as the first line of defense and Build Coat as the second — together they provide substantially better long-term surface performance than either alone.
Related Products and Resources
Explore the full Siraya Tech range for resin printing, post-processing, and surface finishing:
Safety Information — Clear Coat for Resin Prints
Important: UV-curable coating resins contain acrylate monomers and photoinitiators that are skin and eye sensitizers in their uncured liquid state. Follow all safety precautions during application and until the coating is fully cured under UV light.
- Skin protection: Always wear nitrile gloves when handling uncured Build Coat. Repeated skin contact with uncured acrylate resins can cause sensitization — once sensitized, even trace contact may trigger allergic reactions. Nitrile gloves provide effective barrier protection. Latex gloves are not recommended as acrylates can permeate latex.
- Eye protection: Wear safety glasses or goggles during application to protect against splashes. If coating resin contacts eyes, flush immediately with clean water for 15 minutes and seek medical attention.
- Ventilation: Apply Build Coat in a well-ventilated workspace. UV resin coatings emit low-level VOCs during application that accumulate in enclosed spaces. Open windows and doors or use a fume extractor when working in small or enclosed areas.
- UV lamp safety: Do not look directly into a UV lamp during the curing process. UV radiation at 365nm to 405nm can cause eye damage with direct exposure. Use UV-blocking safety glasses when operating UV curing equipment.
- Disposal: Do not pour uncured liquid Build Coat down drains or into general waste. Cure any waste coating material fully under UV light before disposal — fully cured resin is an inert solid and can be disposed of with general solid waste in most jurisdictions. Check local regulations for specific disposal requirements.
- Storage: Store Build Coat in a cool, dark location between 15°C and 25°C, away from heat sources, open flames, and UV light. Keep container tightly sealed when not in use. Keep out of reach of children.
- First aid — skin contact: Remove contaminated gloves, wash affected skin thoroughly with soap and water for at least 5 minutes. If irritation develops or persists, seek medical attention.
- First aid — ingestion: Do not induce vomiting. Rinse mouth with water and seek immediate medical attention. Provide the product safety data sheet (SDS) to medical personnel if available.
How Much Clear Coat Do I Need?
Build Coat goes a long way in application — a thin, self-leveling coat covers a large surface area per milliliter. The table below gives approximate coverage guidance to help estimate how much Build Coat is needed for different project types and scales:
| Project Type | Approximate Print Size | Coats Recommended | Estimated Build Coat Volume |
|---|---|---|---|
| Tabletop miniature | 28mm to 75mm figure | 2 coats | 0.5 ml to 1 ml per miniature |
| Small display model | Up to 100mm in any dimension | 2 coats | 1 ml to 3 ml per model |
| Medium display model | 100mm to 200mm | 2 to 3 coats | 3 ml to 8 ml per model |
| Large display model | 200mm to 300mm | 2 to 3 coats | 8 ml to 20 ml per model |
| Jewelry piece | Ring, pendant, earring | 2 to 3 coats | 0.2 ml to 0.5 ml per piece |
| Functional enclosure | Small electronics enclosure | 2 to 3 coats | 5 ml to 15 ml per enclosure |
| Architectural model | A4 footprint or larger | 2 coats | 15 ml to 40 ml per model |
| Batch of miniatures (10 to 20 figures) | 28mm to 54mm figures | 2 coats | 5 ml to 15 ml per batch |
Tip: Build Coat is available in multiple bottle sizes. For hobbyists coating occasional prints, a small bottle provides ample supply for dozens of projects. For production workflows or large-format prints, larger sizes offer better value per milliliter and reduce the frequency of reordering.
Integrating Clear Coat into Your Resin Printing Workflow
Clear coat works best when it is treated as a standard step in the resin print post-processing workflow rather than an optional extra applied only to special pieces. Incorporating Build Coat as a routine final step adds only 10 to 15 minutes to the overall workflow and delivers a consistent professional-quality finish on every print that leaves your build plate.
The recommended full post-processing workflow for resin prints with clear coat finishing is:
- 1. Remove from build plate: Remove the print carefully using a plastic scraper or flush cutters. Avoid metal scrapers that can scratch the FEP film and build plate surface.
- 2. Initial wash: Wash the print in fresh isopropyl alcohol (IPA) or a dedicated resin wash solution for 3 to 5 minutes to remove uncured resin from the surface. Use a wash station with agitation for best results on complex geometry.
- 3. Secondary wash: Transfer to a second container of fresh IPA for a 1 to 2-minute secondary wash to remove any residual uncured resin carried over from the first wash. This step is particularly important for clear prints where resin residue is visible as cloudiness.
- 4. Air dry: Allow the washed print to air dry fully before post-cure. Residual IPA on the surface evaporates quickly at room temperature — typically 5 to 10 minutes. Avoid using heat guns to accelerate drying as this can warp thin-walled prints.
- 5. Remove supports: Remove support structures after washing and drying but before post-cure if the resin is still slightly flexible — this reduces the risk of breaking fine details when removing supports. Alternatively remove after post-cure using flush cutters for a cleaner break point.
- 6. Post-cure: Post-cure the print in a UV curing station for the full recommended time for your resin type. Most standard resins require 2 to 5 minutes per side under a dedicated UV curing station. Refer to your resin manufacturer's post-cure recommendations for exact times and distances.
- 7. Sand and refine (optional): For display-quality prints, wet sand with 400-grit then 800-grit sandpaper to remove support witness marks, layer lines, and surface variation. Clean with IPA after sanding.
- 8. Prime and paint (optional): If the print is to be painted, apply a resin-compatible primer at this stage. Allow primer to dry fully, then apply acrylic paint layers as required.
- 9. Apply Build Coat: Apply one to three thin coats of Build Coat, curing fully under UV between each coat. This is the protective finishing step that locks in surface quality, adds UV protection, and seals the print against handling damage and environmental degradation.
- 10. Final inspection: Inspect the finished print under good lighting to confirm even coverage, consistent gloss, and no surface defects in the clear coat. Touch up any missed areas with a fine brush and spot-cure under UV if needed.
Protect Every Print with Siraya Tech Build Coat
Every resin print you produce represents time, material, and creative effort. Clear coat is the final step that protects that investment — sealing the surface, blocking UV degradation, adding hardness and scratch resistance, and delivering the polished, professional finish that distinguishes a properly finished resin print from an unprotected one.
Siraya Tech Build Coat is purpose-formulated for resin 3D prints — not adapted from a different industry or application. It bonds chemically to photopolymer surfaces, cures water-clear in minutes under UV, self-levels to a smooth high-gloss finish without brush marks, and provides genuine long-term UV and surface protection that generic spray lacquers and varnishes cannot match.
The professional clear coat for resin 3D prints. UV-curable, water-clear, self-leveling, fast-curing. Compatible with all SLA, DLP, and MSLA resin prints. Available in multiple sizes for hobbyist and production use.
Shop Build Coat